
Last updated on September 15th, 2026 at 08:08 pm
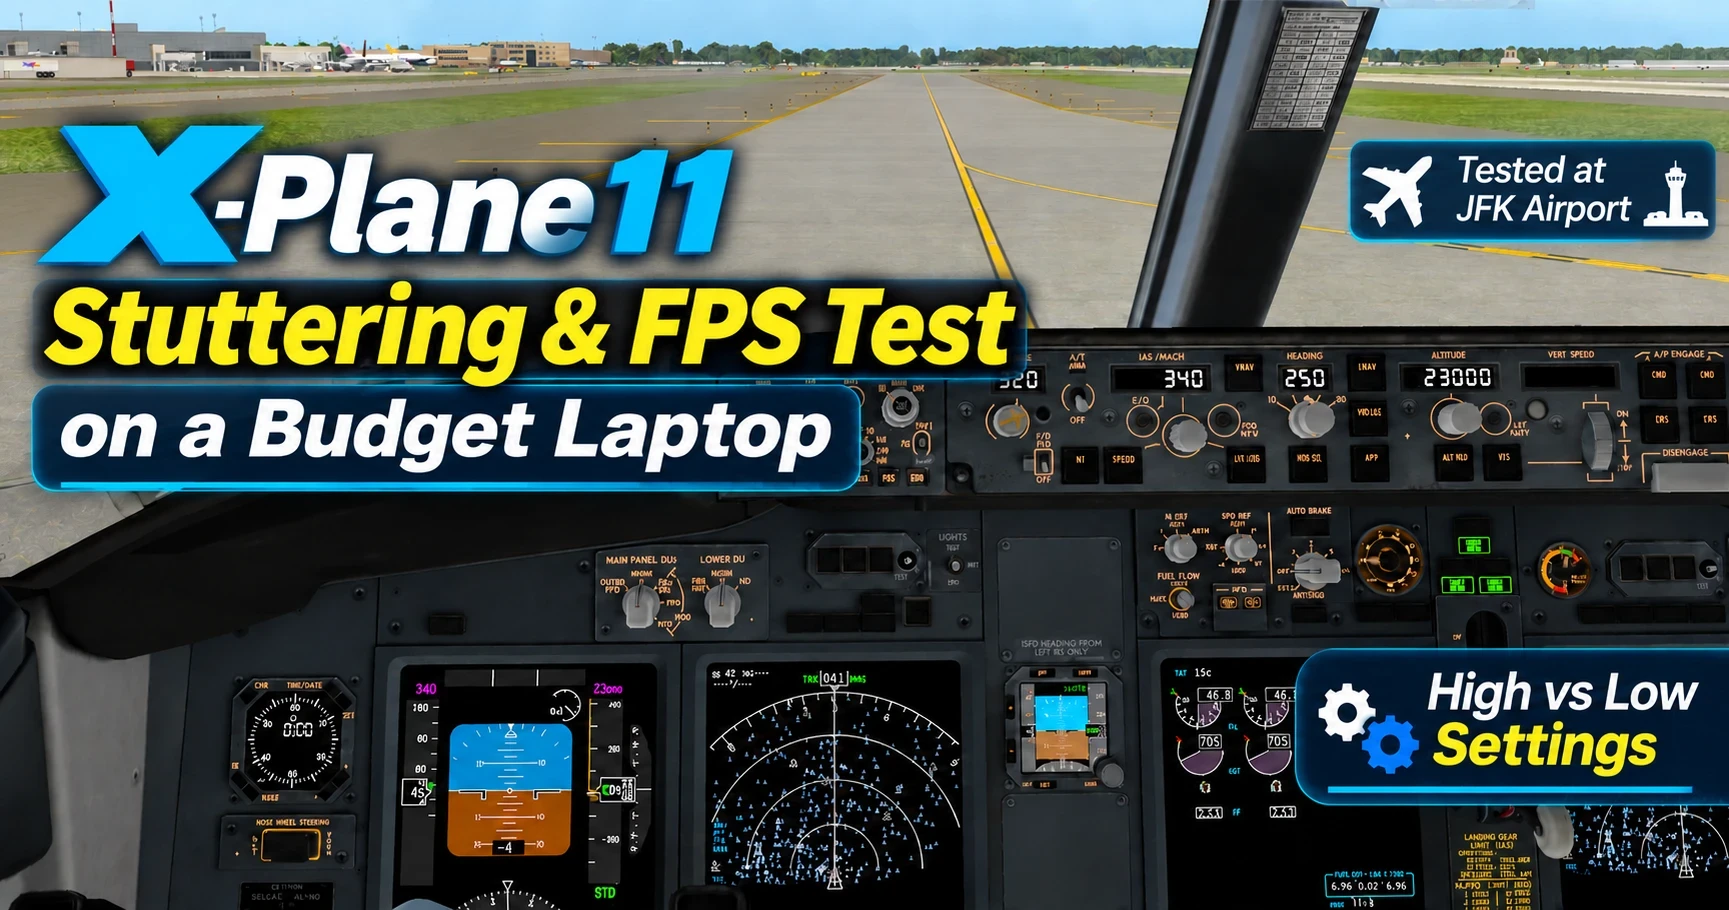
Running X-Plane 11 on a regular laptop can require some experimentation with graphics settings. A simulator may technically run, but low FPS, stuttering, and inconsistent performance can make the experience much less comfortable.
I wanted to see how much of a difference graphics settings would make on my own laptop, so I tested X-Plane 11 at JFK Airport using the Boeing 737-800. My laptop has a Ryzen 7 processor, 16 GB of RAM, and integrated Radeon graphics, so it is not a dedicated gaming laptop.
If you’re new to flight simulation on regular hardware, I also have a beginner guide to starting flight simulation on a low-end or mid-range PC, where I cover simulator choice, hardware expectations, and getting started.
Hardware specifications don’t always tell you exactly how a simulator will perform in real use. I explored this further in my flight simulator system requirements vs reality comparison using both my older and current laptops.
I first tested different graphics levels while taxiing at JFK. I then continued the testing by taking off and flying from JFK using high and low settings. I recorded videos and took screenshots of the graphics settings so I could compare not only the FPS numbers but also how smoothly X-Plane 11 actually behaved.
The results showed a noticeable difference as I reduced the graphics load.
Low FPS and Stuttering Are Not Exactly the Same
Before looking at my results, I think it is useful to separate low FPS from stuttering.
Low FPS means the simulator is producing fewer frames per second, which can make movement look less smooth. Stuttering is what I noticed when X-Plane 11 would move smoothly for a moment, briefly pause or hitch, and then continue moving.
The two can happen together, but I don’t think the FPS counter alone tells the whole story. During these tests, I watched both the frame rate and how consistently the simulator was moving.
That became particularly noticeable when I started testing the more demanding graphics settings.
My Maximum Settings Test at JFK
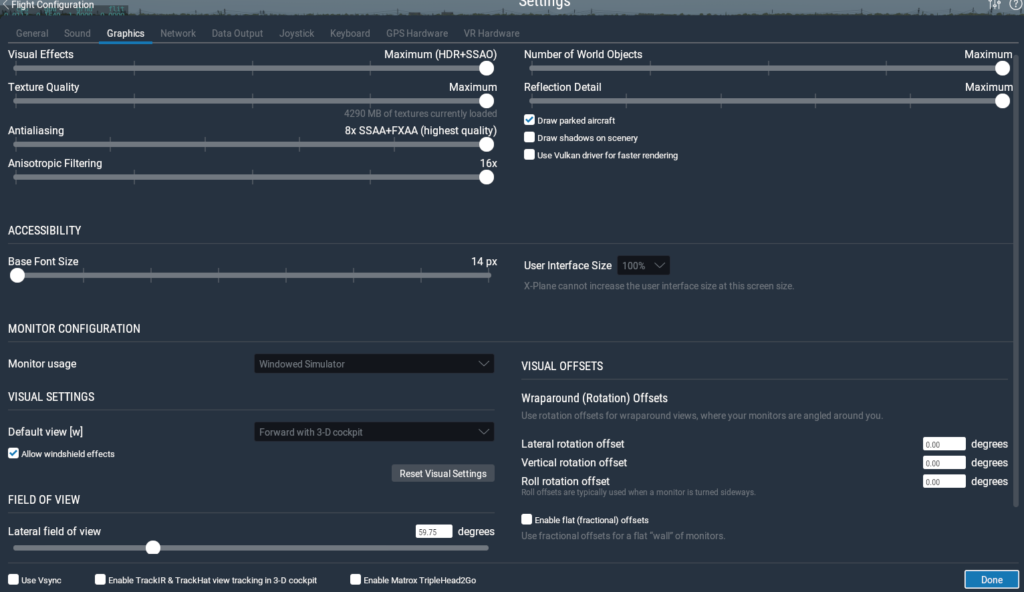
I started with the graphics settings pushed very high. Visual Effects, Texture Quality, Number of World Objects, and Reflection Detail were set to maximum. Anti-aliasing was set to 8x SSAA+FXAA, while Anisotropic Filtering was set to 16x.
The result was immediately noticeable.
While taxiing the Boeing 737-800 at JFK, my frame rate dropped to only around 3–4 FPS, and I experienced frequent stuttering. The simulator would move and then briefly pause before continuing.
The extremely low frame rate also made it difficult to move around the aircraft and cockpit. Whether I used the keyboard or the view button on top of my joystick, changing my view felt slow and unresponsive.
For my laptop, maximum settings were clearly too demanding to provide a comfortable experience at JFK.
High Settings Improved Performance
I then reduced the graphics settings and repeated the taxi test.
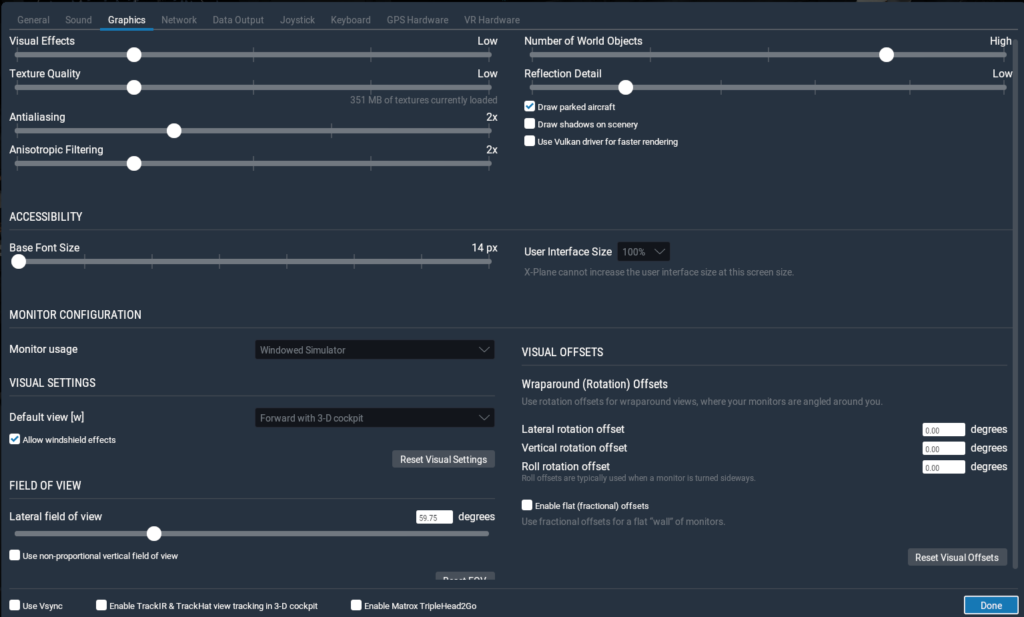
At high settings, my frame rate improved to approximately 15–20 FPS. Stuttering was still present, but it was less severe than what I experienced at maximum settings.
Moving around the aircraft and cockpit also became easier. The difference from 3–4 FPS was substantial, although the simulator still wasn’t as smooth as I would prefer.
This was my first indication during the test that reducing the overall graphics load was helping with more than just the FPS number. The visible stuttering was also becoming less common.
Medium Settings Reached the Early 20s
I reduced the graphics settings further and repeated the test.
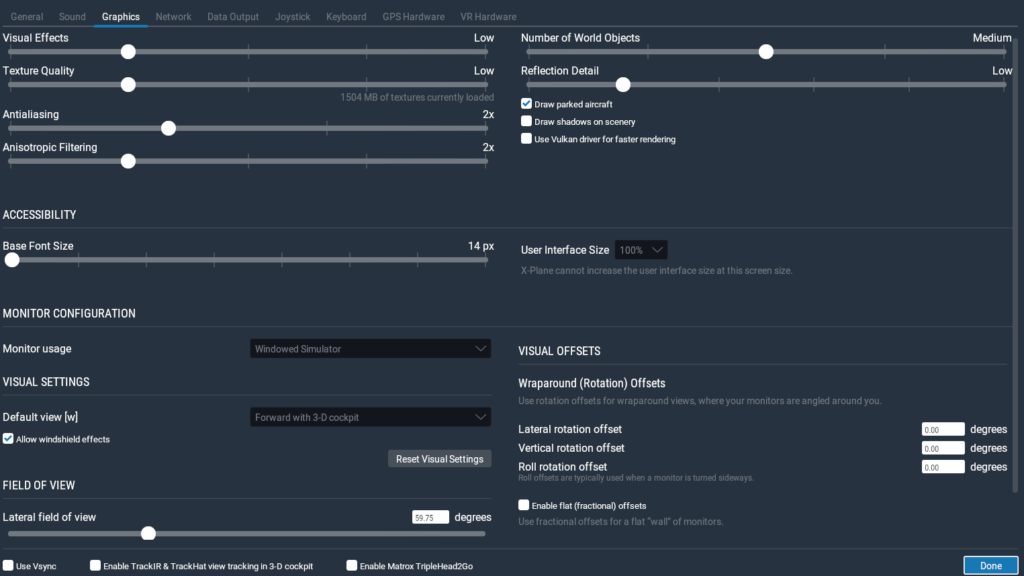
At medium settings, my frame rate reached the early 20s. The simulator felt smoother than it did during the maximum and high tests, and the stuttering became less common.
This was much more manageable than the performance I experienced at maximum settings. It also showed that I didn’t necessarily need to reduce everything immediately to the lowest possible level to see an improvement.
Low Settings Gave Me the Smoothest Taxi Test
Finally, I tested my lowest graphics configuration.
During this test, FPS increased into the mid-20s, and I noticed almost no stuttering while taxiing around JFK.
Moving around the cockpit and aircraft also felt considerably easier than it did at maximum settings. Although the visual quality was reduced, the simulator was much more responsive.
For this particular taxi test, low settings provided the smoothest overall result on my laptop.

Comparing My Four Taxi Tests
Here is what I observed while taxiing the Boeing 737-800 at JFK:
| Graphics settings | FPS | Stuttering |
| Maximum | Around 3–4 FPS | Frequent/heavy |
| High | Around 15–20 FPS | Less than maximum |
| Medium | Early 20s | Less common |
| Low | Mid-20s | Almost none noticed |
There was a clear pattern on my laptop. As I reduced the overall graphics load, FPS increased and the stuttering became less common.
However, these tests changed several graphics settings at the same time. Because of that, I cannot say from this comparison that one particular setting was responsible for reducing the stuttering.
What I can say is that lowering the overall graphics settings significantly improved both FPS and smoothness during my JFK taxi tests.
Testing High and Low Settings During Takeoff From JFK
After completing the taxi tests, I wanted to see whether the difference would continue once I took off from JFK.
For this part of the test, I focused on my high and low graphics configurations. I used the Boeing 737-800 again and monitored the FPS during takeoff and departure.
This time, I was particularly interested in FPS stability rather than only looking for the pause-and-resume stuttering I had noticed while taxiing.
High Settings: FPS Fluctuated More During Takeoff
With high graphics settings, the frame rate during takeoff and departure was approximately 13–17 FPS.
I noticed the FPS moving up and down within this range rather than remaining at a relatively consistent level. Performance was better than the 3–4 FPS I had experienced with maximum settings during the earlier taxi test, but it was still relatively low.
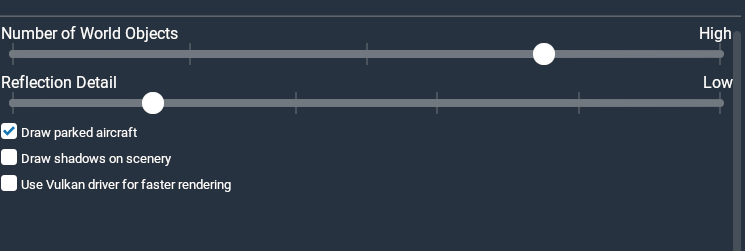
Low Settings: Around 20 FPS and More Stable
I then tested the same type of departure using my lower graphics settings.
This time, FPS stayed at around 20 FPS and was mostly stable. The number itself wasn’t dramatically higher than the upper end of my high-settings result, but the consistency was noticeably better during my test.
Instead of repeatedly moving between approximately 13 and 17 FPS, performance stayed closer to 20 FPS for most of the takeoff.

What the Takeoff Test Added to My Results
The takeoff test gave me another way to look at performance.
During taxiing, the biggest difference was the amount of visible stuttering. Maximum settings produced frequent stutters, while the stuttering became progressively less common as I reduced the graphics settings.
During takeoff, I noticed another difference. High settings produced approximately 13–17 FPS with more fluctuation, while low settings stayed around 20 FPS and were mostly stable.
This reinforced something I have noticed when testing flight simulator performance: the highest FPS number isn’t the only thing worth watching. Consistency also affects how the simulator feels.
I also compared playable FPS versus comfortable flying during a complete X-Plane 11 flight from Toronto to Ottawa, where I recorded how FPS changed during different stages of the flight.
Graphics Quality vs Smooth Performance
There was an obvious trade-off between graphics quality and performance during these tests.
Maximum settings provided more visual detail, but 3–4 FPS with frequent stuttering made the simulator difficult to use comfortably. For me, the extra graphical detail wasn’t worth that performance cost.
Lower settings reduced some of the visual quality, but they gave me higher FPS, fewer stutters while taxiing, and more stable performance during my low-settings takeoff test.
That doesn’t mean everyone needs to run X-Plane 11 at low settings. A more powerful computer may handle much higher settings comfortably.
Even on my laptop, medium settings reached the early 20s during my taxi test, so there can be room to find a balance between visual quality and performance rather than simply choosing the lowest possible settings.
Can I Say Which Setting Caused the Stuttering?
Not from these tests alone.
I changed several graphics settings between the maximum, high, medium, and low configurations. That means my results demonstrate what happened when I reduced the overall graphics load, but they don’t isolate one individual setting as the cause.
For example, Texture Quality, World Objects, reflections, anti-aliasing, and other settings changed across the tests.
To determine whether one particular option has a major effect on stuttering, I would need to keep the other settings the same and change only that option.
That’s something I can test separately.
What About Texture and Memory Usage?
Texture and memory usage are worth considering, particularly when using integrated graphics, but I don’t want to assume that they caused the stuttering I experienced.
My settings screenshots showed differences in the amount of textures loaded as I changed the graphics configuration. However, because multiple settings changed together, these tests weren’t designed to isolate texture usage as the cause.
A separate test could compare Texture Quality while leaving the other settings unchanged. The same method could be used for World Objects, reflections, anti-aliasing, and other settings.
That would provide better evidence about which individual settings make the biggest difference on my laptop.
How I Would Troubleshoot Stuttering on a Budget Laptop
Based on these tests, I wouldn’t immediately assume that a budget laptop simply cannot run X-Plane 11 because it stutters at demanding settings.
I would first reduce the graphics load and compare the results.
Pay attention to more than the FPS counter. Look at whether the simulator pauses or hitches, whether movement remains consistent, and whether changing cockpit views feels responsive.
If lowering the overall settings helps, you can then increase individual settings gradually to find a better balance between graphics and performance. If you want to look at other settings that can affect performance, I tested several of them in my 10 flight sim settings tweaks for budget hardware, including World Objects, AI traffic, weather, and shadows.
For more detailed troubleshooting, changing one setting at a time is better because it helps identify which option is actually affecting your system.
Frequently Asked Questions
What is stuttering in X-Plane 11?
From what I observed during my testing, stuttering was different from simply having a low frame rate. The simulator would move, briefly pause or hitch, and then continue moving again. At maximum settings during my JFK taxi test, this happened frequently.
Can low graphics settings reduce stuttering in X-Plane 11?
They did during my test. At maximum settings, I was getting around 3–4 FPS with frequent stuttering. As I reduced the graphics settings, FPS increased and the stuttering became less common. At my lowest settings, I was getting FPS in the mid-20s during taxiing and noticed almost no stuttering.
This does not mean low settings will fix every stuttering problem, but reducing the overall graphics load clearly helped on my laptop.
Is low FPS the same as stuttering?
Not necessarily. Low FPS means fewer frames are being produced each second. Stuttering can appear as brief pauses or hitches in otherwise continuous movement.
The two can occur together, which is what I experienced at maximum settings, but I think it is useful to watch both the FPS counter and the actual movement of the simulator.
Why did I test X-Plane 11 at JFK Airport?
I chose JFK because it is a large airport and provided a demanding environment for testing my laptop. I used the Boeing 737-800 while taxiing and later during takeoff so I could compare performance under different graphics configurations.
What FPS did I get while taxiing at JFK?
My results changed significantly depending on the graphics settings. Maximum settings gave me around 3–4 FPS, high settings around 15–20 FPS, medium settings reached the early 20s, and low settings reached the mid-20s.
Stuttering also became less common as I lowered the settings.
What happened to FPS during takeoff from JFK?
During my high-settings takeoff test, FPS fluctuated between approximately 13 and 17. When I repeated the test using low settings, FPS stayed around 20 and was mostly stable.
This showed me that lowering the graphics settings affected not only the FPS I was getting but also how consistent the performance was during my test.
Should I automatically use low settings on a budget laptop?
Not necessarily. Low settings gave me the smoothest performance during these particular tests, but they also reduced visual quality.
Medium settings reached the early 20s during my taxi test and retained more graphical detail. I think it makes more sense to experiment and find a balance that works for your own hardware and the type of flying you do.
Which graphics setting caused my X-Plane 11 stuttering?
I cannot identify one specific setting from these tests because I changed several graphics options between the maximum, high, medium, and low configurations.
My results show that reducing the overall graphics load helped, but determining which individual setting contributed most would require testing one setting at a time.
What My JFK Tests Taught Me About Stuttering and FPS
Testing X-Plane 11 at JFK gave me a much clearer picture of how graphics settings affected performance on my Ryzen 7 laptop with integrated graphics.
While taxiing the Boeing 737-800, maximum settings resulted in only 3–4 FPS with frequent stuttering. The performance was so low that even moving around the cockpit and aircraft using the keyboard or the view button on my joystick became difficult.
High settings improved performance to approximately 15–20 FPS, while medium settings reached the early 20s with less frequent stuttering. At low settings, FPS reached the mid-20s, and I noticed almost no stuttering during the taxi test.
Taking off from JFK gave me another useful comparison. At high settings, FPS fluctuated between approximately 13 and 17, while low settings stayed around 20 FPS and were mostly stable.
For me, the biggest lesson wasn’t simply that lower settings produced a higher FPS number. The simulator also became more consistent and responsive as I reduced the graphics load.
At the same time, I don’t think these results prove that one particular graphics option caused the problem. My next step would be testing individual settings separately to see which ones have the greatest effect.
For now, my JFK tests showed that pushing X-Plane 11 to maximum settings was not practical on my laptop. Finding a balance between graphics quality, FPS, and consistent movement gave me a much better experience than simply trying to make every graphics slider as high as possible.
The article does a strong job of turning a technical performance test into clear, practical information for readers. From a communication perspective, I especially like the use of comparisons, specific FPS results, and honest limitations rather than making unsupported conclusions about individual settings. Explaining the difference between low FPS and stuttering also helps readers understand the experience rather than focusing only on numbers. Overall, the structured testing and transparent presentation make the content both credible and easy for less-technical readers to follow.
Hi Kavitha,
Thanks for your thoughtful comment. I wanted the article to show what I actually experienced rather than just list technical settings or FPS numbers.
I don’t rely only on FPS when judging performance. From my own experience, around 17–20 FPS can still be playable in X-Plane 11 if the simulator remains smooth and responsive, and I don’t notice much stuttering at that range. This is lower than X-Plane’s general guidance that performance below 20 FPS is considered too low, but in practice I found that the actual experience can depend on how stable the frame rate is.
That’s why I included specific FPS results, comparisons, and the limitations of my testing instead of assuming that one number tells the whole story.
Thanks again for reading and sharing your thoughts.
This is exactly the kind of real-world X-Plane 11 stuttering fix guide I’ve been looking for — testing the Boeing 737-800 across maximum, high, medium, and low graphics settings at a demanding airport like JFK gives budget laptop and integrated graphics users a genuinely honest picture of what to expect, rather than the usual advice that just says “lower your settings” without showing actual FPS numbers. The distinction you made between low FPS and stuttering is something most guides skip entirely, and it completely changes how I’ll be monitoring my own performance going forward — watching for those brief pauses and hitches rather than just staring at the FPS counter. I’m curious whether you found that World Objects or Texture Quality had the bigger individual impact on stuttering when you reduced settings, since those two seem like the most likely culprits on integrated graphics hardware?
Hi Leah,
Thanks for your detailed comment. From my testing, lowering World Objects made the more noticeable difference in performance, especially at a demanding airport like JFK where there are a lot of buildings and scenery to render.
In another test on my Ryzen 7 laptop with integrated Radeon graphics at JFK, I set Texture Quality to Maximum and noticed only a slight improvement in FPS when adjusting other settings. Because of that, World Objects seemed to have a bigger impact on performance in my setup.
What I found most useful was changing one setting at a time and watching not only the FPS counter, but also whether the simulator stayed smooth and responsive without brief pauses or hitches.
I’m curious if you tested X Plane 11 with Vulkan enabled or if these results were all using the same rendering mode. On a budget laptop with integrated graphics, could switching between Vulkan and OpenGL make a noticeable difference in stuttering or FPS? I also wonder if the laptop was plugged in and set to a high performance power mode during the tests, since that can sometimes change performance quite a bit on laptops.
Hi Anna,
Thanks for the questions. I did try Vulkan on my older hardware, and in my case it did not make a big improvement in FPS. In some situations, the FPS was actually lower than what I was getting before, so Vulkan was not automatically better for my setup.
One thing that did make a noticeable difference was changing the laptop power setting to High Performance. I saw better FPS after doing that, so power mode mattered more in my case than switching to Vulkan.
That experience showed me that performance tweaks can affect each laptop differently, especially with older or integrated graphics hardware, so I think it is better to test one change at a time and compare the results.