
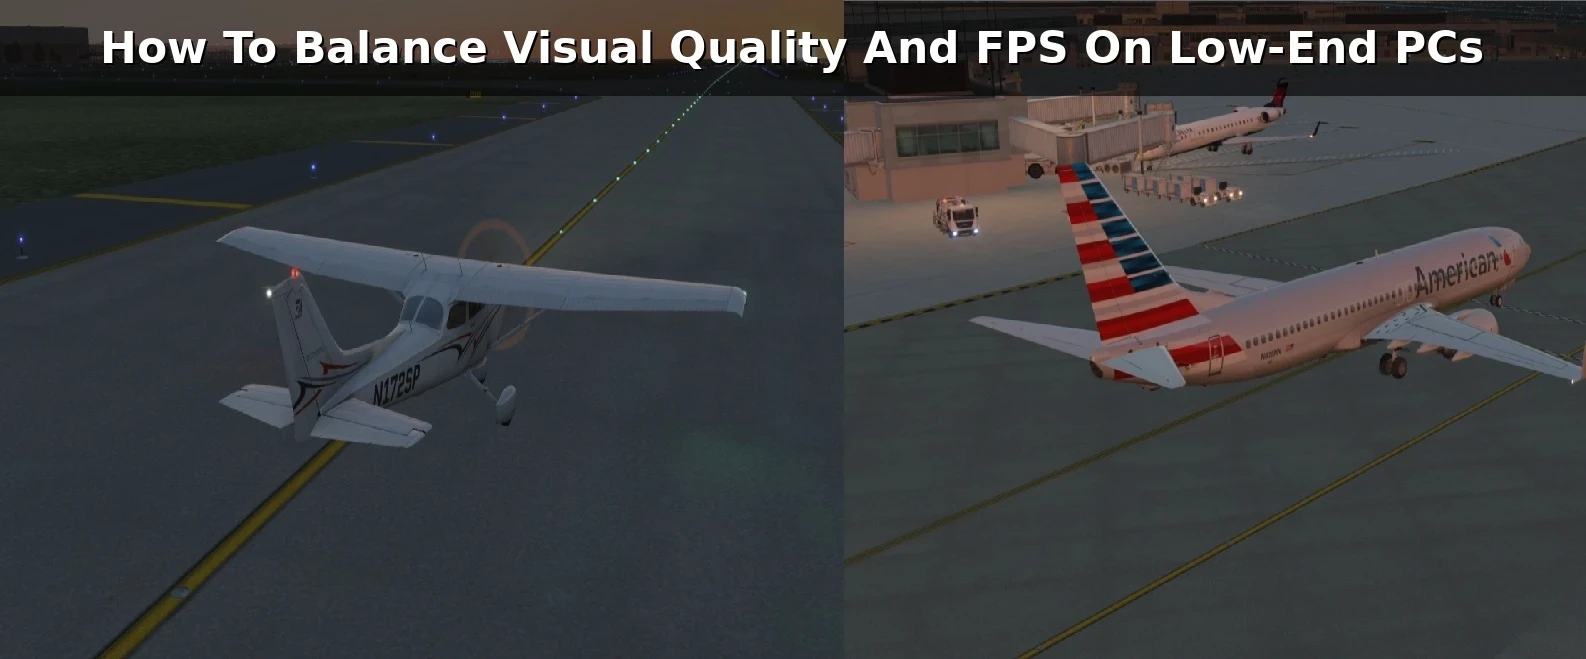
Getting the best visuals while keeping gameplay smooth can be challenging, especially when you’re working with budget hardware. As someone using a Lenovo IdeaPad Slim 3 with an AMD Ryzen 7 processor and integrated Radeon graphics, I have to find a practical balance between visual quality and performance.
Why does this matter? In a flight simulator, higher visual quality can make the scenery and aircraft look better, but it can also reduce frame rate. On lower-end hardware, increasing graphics settings too far can make the simulator noticeably less smooth.
Rather than simply lowering every setting, I wanted to see how X-Plane 11 actually performed at different visual quality levels on my laptop.
For this test, I used Chicago O’Hare International Airport with both the Boeing 737-800 and Cessna 172. I compared different graphics settings and watched how the FPS changed.
My Setup at Chicago O’Hare: A Unique Perspective
Running X-Plane 11 on a Lenovo IdeaPad Slim 3 requires some compromise between performance and visual quality. My laptop has an AMD Ryzen 7 5825U, 16 GB RAM, and integrated Radeon graphics.
Chicago O’Hare is a useful location for this type of testing because it is a large airport with detailed terminals, taxiways, and surrounding scenery.
To make the comparison more consistent, I tested the aircraft at the same airport while changing the visual settings. This gave me a clearer idea of how much the graphics settings themselves affected performance.
Including different aircraft added another useful comparison. I tested the Boeing 737-800 and the smaller Cessna 172 to see whether aircraft choice made a noticeable difference at the same airport.
Keeping the testing conditions reasonably consistent made it easier to compare the FPS results instead of relying on general assumptions about which settings should perform better.
Performance Test: Comparing High,Medium and Low Settings
Testing different settings in X-Plane 11 showed a clear difference between High and the lower visual settings.
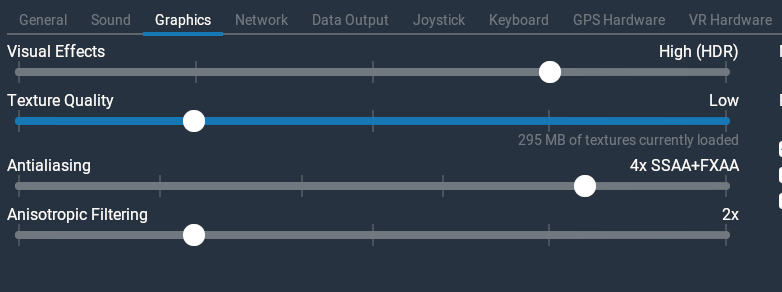
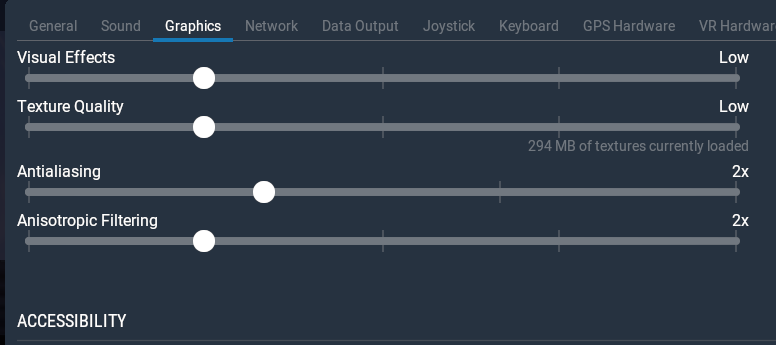
With the Boeing 737-800 at Chicago O’Hare, I tested High visual effects with Low texture quality, 4x SSAA+FXAA antialiasing, and 2x anisotropic filtering. While taxiing, FPS ranged from around 9 to 14. At this level, performance was below what I consider comfortable for normal flying. However, I noticed that the airport lighting during sunset was noticeably brighter on High, with the lights illuminating the ground more strongly than they did at Medium or Low settings.

At Medium visual effects, the result improved significantly. With Low texture quality, 2x antialiasing, and 2x anisotropic filtering, FPS was generally in the 20s. For me, this was usually within a comfortable range. I’ve also compared playable FPS vs comfortable flying in flight simulators, where I looked at how different frame rates actually felt during a flight.
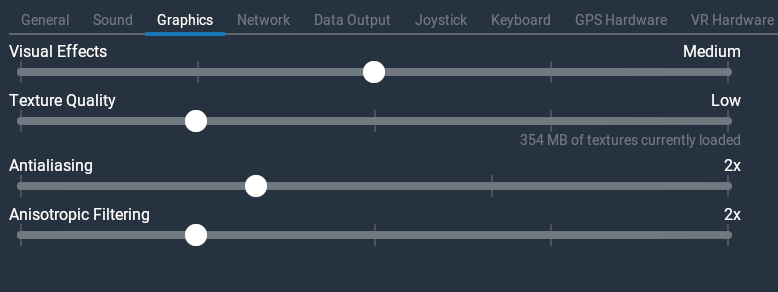
When I lowered the visual effects to Low with the Boeing 737-800, FPS remained fairly similar to Medium and generally stayed in the 20s. In this test, lowering the setting from Medium to Low did not give me a major additional FPS increase.
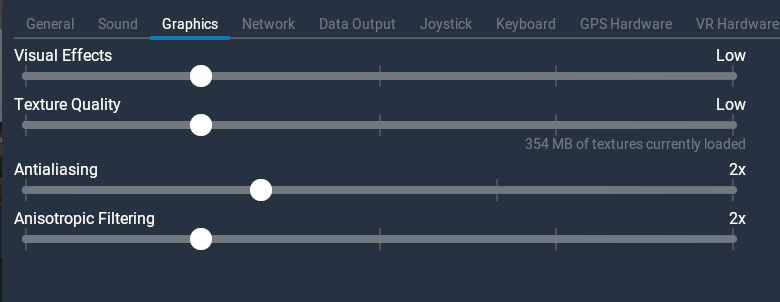
This was useful because it showed that the lowest setting was not automatically the best choice. Medium still provided comfortable performance while allowing somewhat higher visual quality.
I’ve also tested 10 flight sim settings tweaks for budget hardware that can affect performance beyond visual effects alone.
The biggest difference appeared when moving to High. The FPS dropped from the 20s at Medium or Low to around 9–14 FPS with the Boeing. Based on this test, Medium or Low visual quality worked much better on my laptop than High.
Boeing vs. Cessna at Chicago O’Hare: How Aircraft Choice Matters
I also tested the Cessna 172 at Chicago O’Hare to see whether using a smaller aircraft would noticeably improve performance.
At High visual effects, the Cessna stayed around 15–20 FPS, which was better than the 9–14 FPS I recorded with the Boeing 737-800. This showed that aircraft choice could make a noticeable difference even when using the same demanding visual settings.
Testing the Cessna 172 at Chicago O’Hare in X-Plane 11 using High visual settings during sunset. FPS stayed around 15–20, which was better than my Boeing 737-800 High-settings test. I also noticed that the airport lights illuminated the ground more clearly at High visual effects, making the scene look brighter during sunset.
Using Low visual effects with the Cessna produced somewhat better performance overall. FPS stayed near the 20s, although it sometimes dropped lower during the test.
Testing the Cessna 172 at Chicago O’Hare in X-Plane 11 using Low visual settings. FPS stayed near the 20 FPS range but sometimes dropped lower. I also noticed that the airport lights did not noticeably illuminate the ground at Low visual effects, so the visual difference compared with High was easy to see.
This showed that the visual settings had a major effect on both performance and appearance. High settings improved the airport lighting during sunset, while Low settings generally gave me better FPS.
The comparison also showed that aircraft choice still mattered. The Cessna performed better than the Boeing at High settings, but the graphics settings themselves also had a major effect on the final result.
If you’re dealing with inconsistent performance, I also documented my experience in an X-Plane 11 stuttering and FPS guide for budget laptops.
Frequently Asked Questions
What visual quality worked best on my low-end PC?
Based on my testing, Medium or Low visual quality worked best overall. With the Boeing 737-800 at Chicago O’Hare, both settings generally kept FPS in the 20s, while High dropped performance to around 9–14 FPS.
Did Low settings perform much better than Medium?
Not in my Boeing 737-800 test. Low and Medium both generally stayed in the 20 FPS range. That means Medium may be a better choice when I want slightly better visuals without losing much performance.
Did the Cessna 172 perform better than the Boeing 737-800?
Yes, especially at High visual effects. The Cessna stayed around 15–20 FPS, compared with 9–14 FPS for the Boeing 737-800. At Low visual effects, the Cessna stayed near the 20s but sometimes dropped lower.
Are High graphics settings worth using on a low-end PC?
That depends on whether visual quality or smoother performance matters more. On my laptop, High settings caused a noticeable FPS drop, especially with the Boeing 737-800. However, High visual effects also improved the airport lighting during sunset, with the lights illuminating the ground more clearl
Is the lowest setting always the best for FPS?
Not necessarily. My Boeing test showed that dropping from Medium to Low did not provide a major additional FPS gain. That is why testing different settings is more useful than simply assuming Low is always best.
What I Learned From My X-Plane 11 Testing
My testing at Chicago O’Hare showed that finding the right balance between visual quality and FPS is more useful than simply pushing the graphics as high as possible or lowering everything to the minimum.
With the Boeing 737-800, Medium and Low settings generally kept FPS in the 20s, while High dropped performance to around 9–14 FPS. With the Cessna 172, High settings stayed around 15–20 FPS, while Low settings stayed near the 20s but sometimes dropped lower.
The Cessna also showed an important visual trade-off. At High visual effects, the airport lights illuminated the ground more clearly during sunset. At Low visual effects, that lighting effect was much less noticeable.
For my Lenovo IdeaPad Slim 3, Medium or Low visual quality worked best overall. Medium can be a good option when I want somewhat better visuals without a major performance penalty, while Low can still be useful when performance is the priority.
The biggest lesson from these tests is that the best setting depends on the aircraft, airport, visual effects, and hardware being used. This is also why I look at flight simulator system requirements versus real-world performance, because meeting the listed requirements does not always tell you how a simulator will actually run. Testing the simulator under real flying conditions gave me a much clearer picture of what my laptop could actually handle.
The article does a good job of showing that performance optimization is really about finding the right balance rather than simply lowering every graphics setting. I especially liked the comparison between the Boeing 737-800 and Cessna 172 because it demonstrates how different variables can affect the overall experience. From a communication standpoint, the use of specific FPS ranges and real-world testing makes the findings easy to understand and gives readers practical information they can apply to their own setups. It’s a strong example of how clear comparisons and firsthand observations can make technical content more useful and credible.
Hi Kavitha,
Thanks for your thoughtful comment. I agree that performance optimization is more about finding the right balance than simply lowering every setting.
In my testing, comparing the Boeing 737-800 with the Cessna 172 helped show that aircraft choice can affect performance, but it isn’t always the biggest factor. Settings, airport density, and scenery can also make a noticeable difference. I carried out these particular tests under clear skies, so I haven’t yet compared the two aircraft under different weather conditions.
That’s why I like using actual FPS ranges and real flight tests instead of relying only on system requirements or assumptions.
What a genuinely useful visual quality vs FPS comparison — the fact that dropping from Medium to Low settings on the Boeing 737-800 at Chicago O’Hare didn’t produce a significant FPS gain is such an important finding for budget laptop and low-end PC users who automatically assume the lowest graphics settings are always the safest choice. The Boeing 737-800 vs Cessna 172 comparison was equally eye-opening, because it shows that aircraft complexity is just as much a performance variable as graphics settings when you’re running X-Plane 11 on integrated graphics — something most beginner guides never mention. I’m curious whether you plan to test how adding weather effects like clouds or rain at Medium visual settings impacts FPS stability on the Lenovo IdeaPad, since that’s the next real-world variable most of us encounter once we find a comfortable baseline graphics setup?
Hi Leah,
Thanks again for your detailed comment. In this particular test, I used clear skies, so I haven’t yet compared Medium settings with clouds or rain on my Lenovo IdeaPad with Ryzen 7 and integrated Radeon graphics.
From my other X-Plane 11 testing, I have noticed that weather can lower FPS slightly, but I would like to test it more carefully before making a conclusion about how much it affects stability at Chicago O’Hare.
I think that would be a useful next test because weather adds another real-world variable once you already have a graphics setup that feels comfortable.