
Last updated on September 23rd, 2026 at 08:28 pm
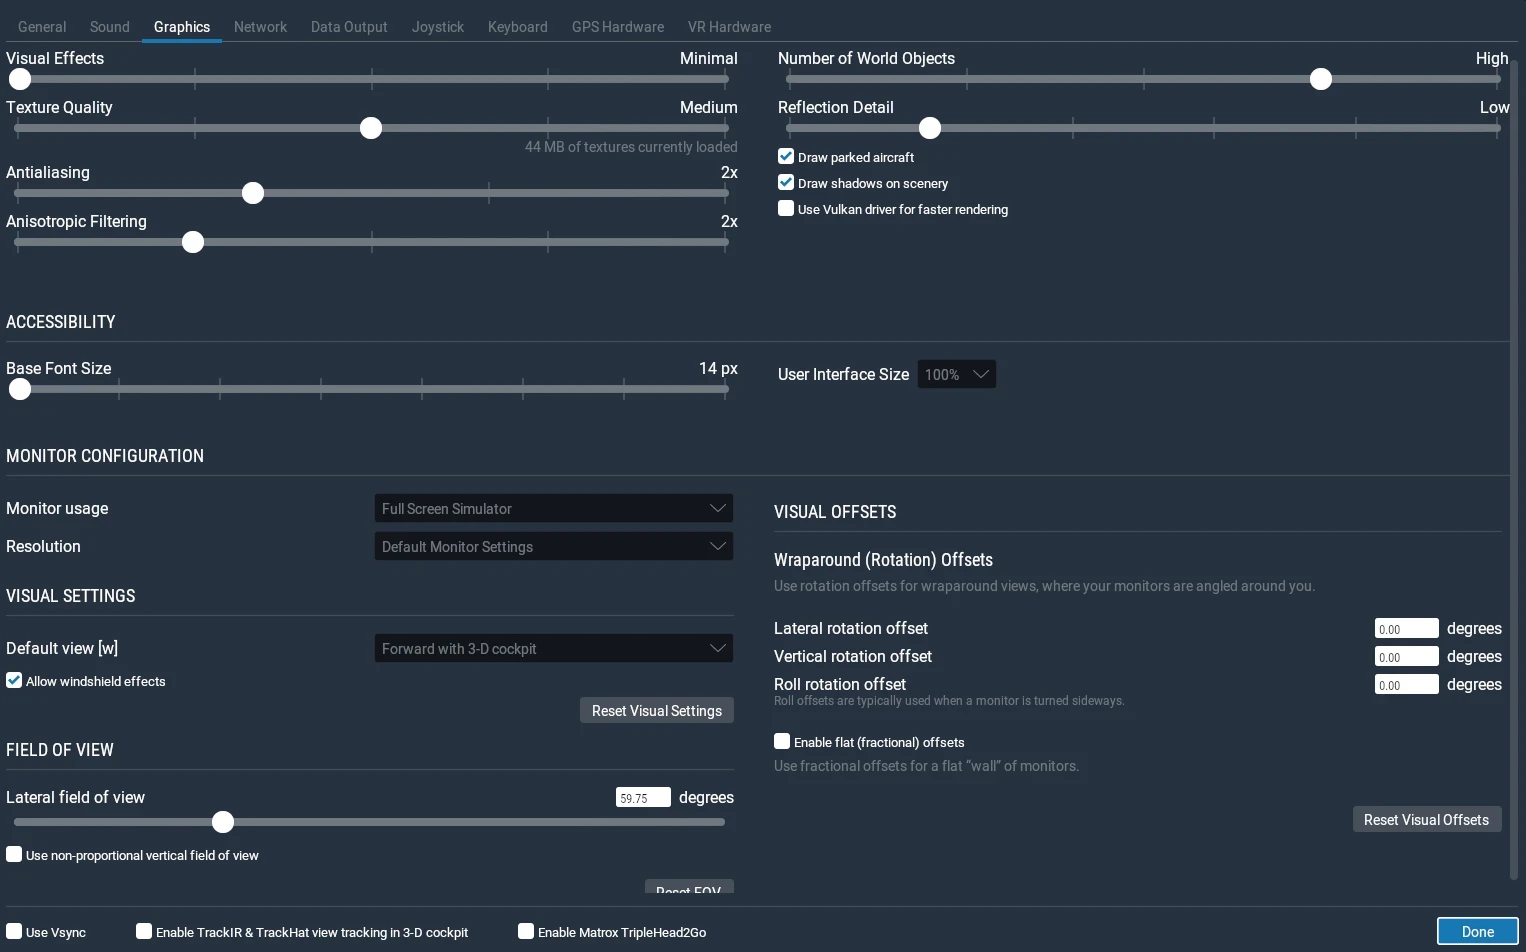
Getting a new flight simulator up and running smoothly on budget hardware feels like a challenge. The thrill of soaring across the virtual skies can quickly be grounded by just a handful of bad settings choices. I quickly learned that going for the highest visual quality isn’t the way to go when your goal is a stable and smooth frame rate.
If you’re completely new to flight simulation, my beginner guide to starting flight simulation on a low-end or mid-range PC covers the basics of getting started before making more detailed performance adjustments.
When I upgraded to my regular laptop with a Ryzen 7 processor, 16GB of RAM, and integrated Radeon graphics, X-Plane 11 performed much better than it did on my older laptop. However, because I’m still using integrated graphics rather than a dedicated gaming GPU, I’ve found that adjusting the settings can help me balance visual quality with performance.
I also compared official system requirements with my actual experience on different hardware in my Flight Simulator System Requirements vs Reality on Low to Mid-Range PCs article.
This is where tweaking settings steps into the spotlight. Simply put, it’s about getting the best experience without turning your rig into a slide show. Trust me, a few strategic changes can mean the difference between a frustrating experience and one that’s flyable and fun. At the heart of these adjustments is the idea of balancing the game’s demands and your system’s capabilities.
From my own journey with X-Plane 11, achieving those smooth 25-30 frames per second feels like an art of compromise. For many of us playing on budget-friendly setups, the aim is to find that sweet spot where visuals meet performance reliably. Once you get that balance right, the joy of virtual flying becomes much more rewarding and less about hardware limitations.
Essential Graphics Settings Tweaks for Optimal Performance
1. Lower the Number of World Objects
One setting that made a noticeable difference during my testing was the Number of World Objects in X-Plane 11. I tested this by flying a Cessna 172 over New York City, where the large number of buildings and scenery objects can put more demand on the system.
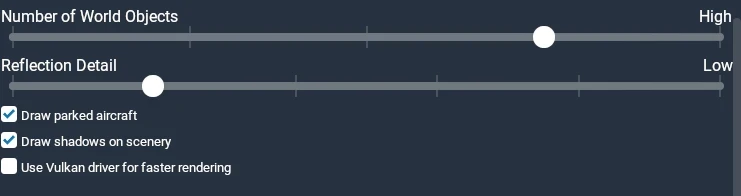
With the Number of World Objects set to High, my frame rate was around 18–20 FPS. When I changed the setting to Low, the frame rate increased into the high 20s and sometimes reached the 30s. There were fewer scenery objects visible at the lower setting, but the improvement in performance was noticeable.
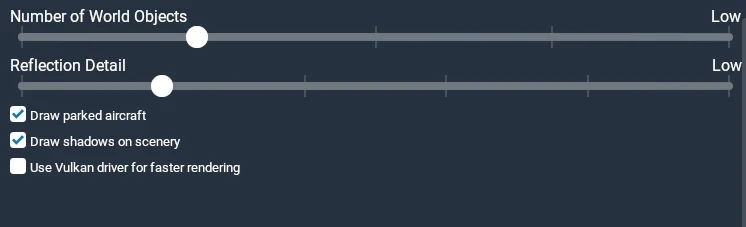
This test showed me that reducing the Number of World Objects can make a significant difference when flying over a dense city, especially on a laptop with integrated graphics.
2. Reduce Cloud & Weather Density
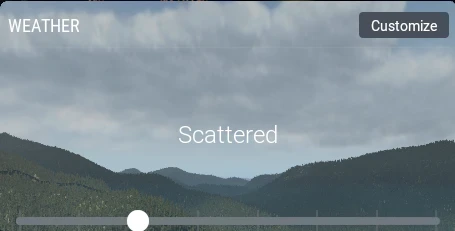
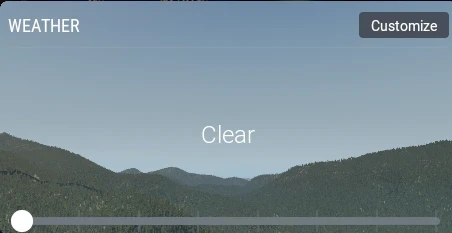
Clouds can affect performance, so I decided to compare Clear weather with Scattered clouds in X-Plane 11 while flying a Cessna 172 around New York City. I kept the other settings as similar as possible during both tests.
With Clear skies, my frame rate was around 17–20 FPS. With Scattered clouds, it was around 15–19 FPS. In my test, Clear weather performed slightly better, although the difference was not very large. This showed me that clouds can affect performance, but the impact can vary depending on the conditions and other settings.
3. Adjust Texture Resolution and Filtering
Texture resolution and filtering? Another big one. With limited VRAM on a regular setup, it’s important to keep textures manageable. Too much detail in the textures might look great in screenshots but can seriously drag your system down during critical flight moments. Opt for a balance where things look nice and clear without choking your machine. These tweaks are all about smart compromises that keep your flight experience smooth and engaging.
Optimizing System Load: Traffic, Frames, and Shadows
4. Reduce AI Traffic
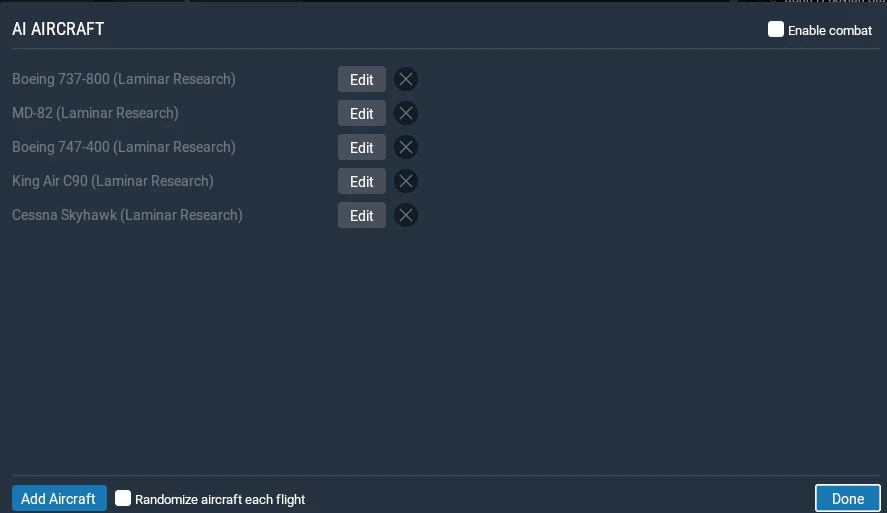
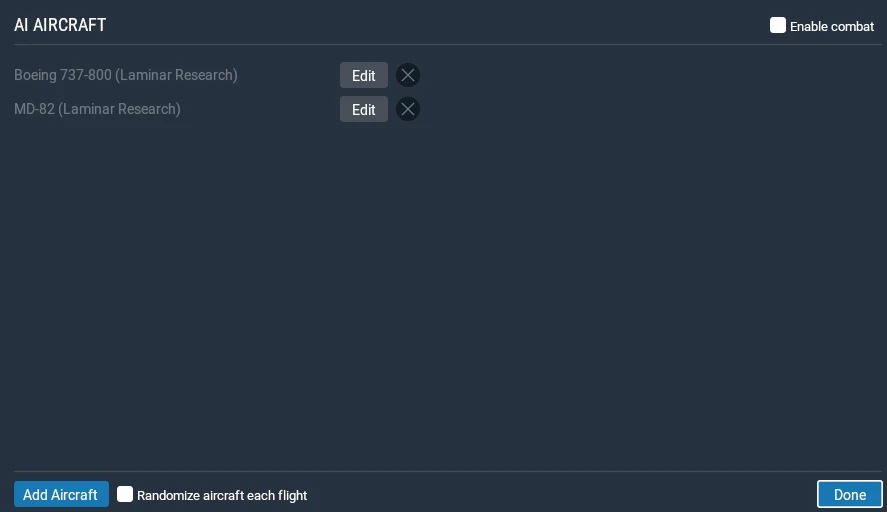
I tested the effect of AI aircraft at JFK Airport while using the Boeing 737-800. With five AI aircraft enabled, my frame rate was around 15–19 FPS. I could also hear ATC communicating with the other AI aircraft, which added more activity and realism around the airport.
I then removed three of the AI aircraft, leaving only two. After reducing the number of AI aircraft, my frame rate improved slightly into the low 20s. I also noticed less ATC activity, and during my test I could only hear communication with the other Boeing 737-800.
Based on my test, reducing AI aircraft can provide a small performance improvement while still allowing some AI traffic and ATC activity. For my laptop, keeping two AI aircraft provided a reasonable balance between performance and having other traffic in the simulator.
5. Cap the Frame Rate
Frame Rate Capping works wonders to keep those stutters and spikes in check. By setting a limit (usually around 30 FPS), you prevent those sudden frame drops that can interrupt your flight. Think of it as setting cruise control on a highway—it keeps everything running at a steady speed.
6. Test Your Shadow settings
Shadows can add more detail to the scenery, but I wanted to see how much they affected performance on my laptop. In X-Plane 11, I tested the Draw shadows on scenery option at JFK Airport by comparing the same scene with the setting enabled and disabled. In both tests, my frame rate stayed around 17–20 FPS, so I did not notice a meaningful performance difference.
The main difference I noticed was visual. With Draw shadows on scenery enabled, the aircraft shadow looked softer and more blurry to me. With the setting disabled, the shadow appeared sharper. Since the FPS was about the same in both tests and I preferred the sharper appearance, I decided to keep Draw shadows on scenery disabled.
Other systems may respond differently, so I think this is a setting worth testing rather than automatically turning it on or off.
Advanced Tweaks: Reflection, Scaling, and Resource Management
7. Reduce Water Reflections
Getting into the deeper settings can unlock a whole new level of performance. Water reflections, for instance, often demand more than you might guess. By toning these settings down, I found I could maintain a smooth flying experience without really noticing the visual trade-off.
8. Adjust Render Scaling and VSync
Render Scaling and VSync are all about balance. When done right, it feels like finding the right sunglasses on a sunny day—not too dark, not too bright, just perfect. Lower the scaling a bit to free up resources while keeping the visual clarity you need. It may take a few tries to get it just right, but the payoff is in that seamless look on your screen.
9. Keep Your Laptop Cool
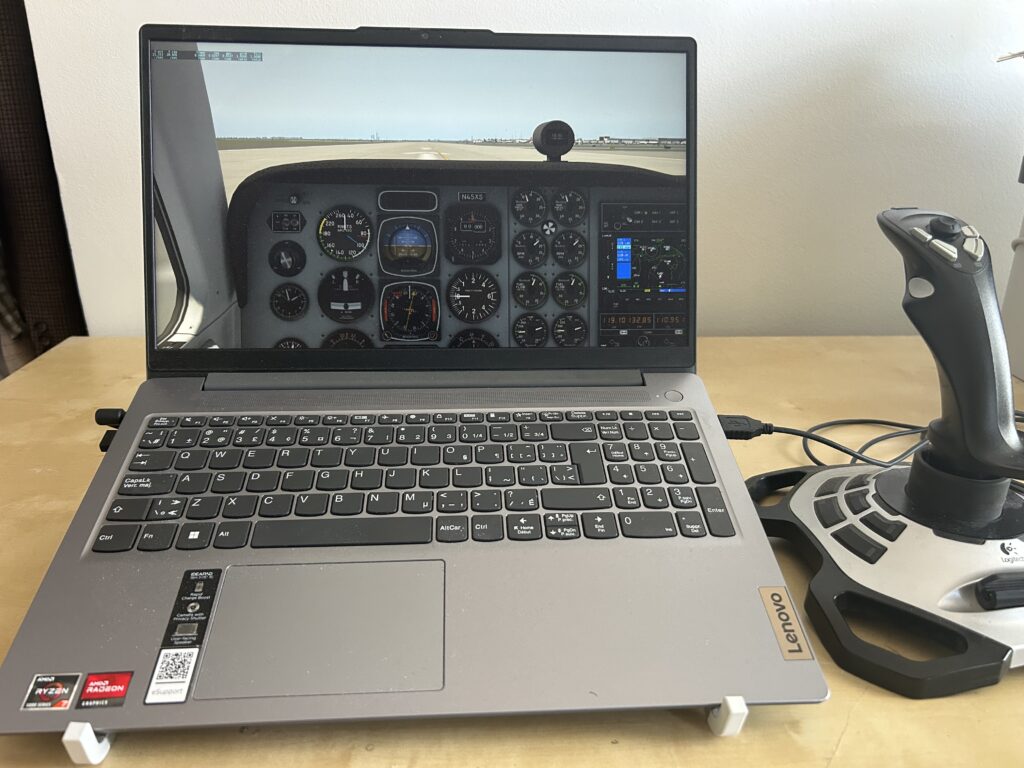
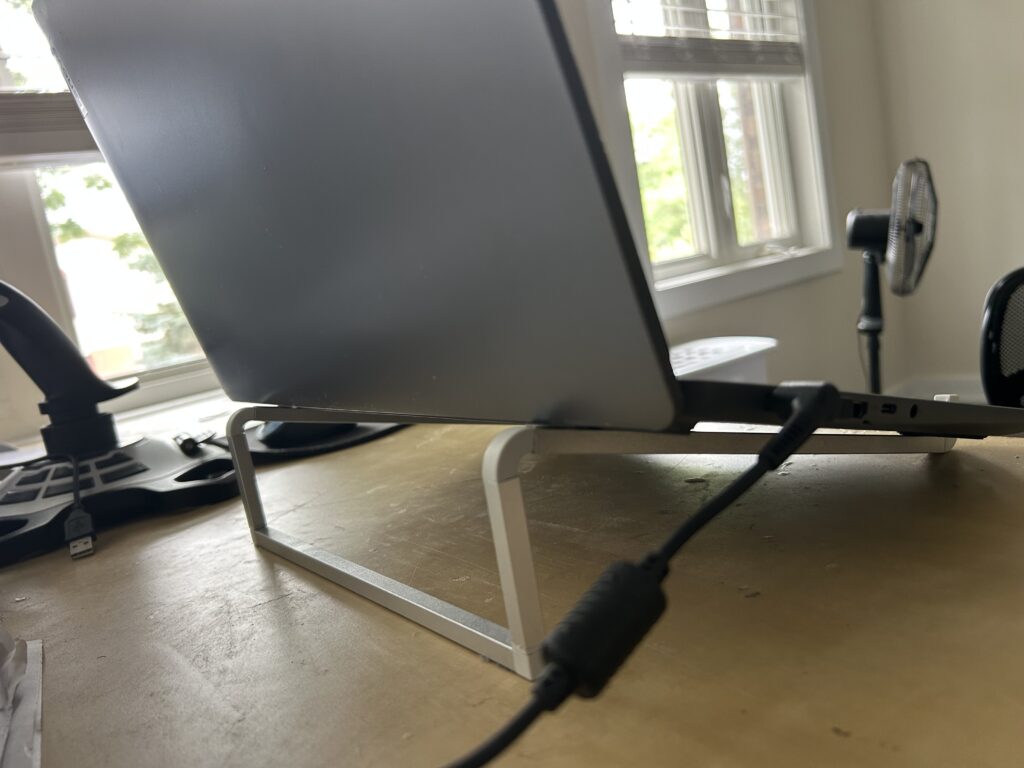
Keeping your setup running cool is another often overlooked factor. Laptops, especially ones on the modest side like mine, can get warmer when running a flight simulator for longer periods. I use a laptop stand to raise my laptop and provide better airflow underneath it. When my room temperature is cooler and stays below around 27°C, I usually see my laptop temperature stay in the low 60s°C, and sometimes it drops into the 50s°C while running X-Plane 11.
10. Close Unnecessary Background Apps
Using a laptop stand to improve airflow and closing unnecessary background apps can also help when running a flight simulator for longer periods.
It’s all about managing your device’s resources smartly to get you those smoother flights, whether it’s adjusting settings or keeping things cool. Consider these tweaks as essential maintenance that ensures your simulator runs without a hitch.
Frequently Asked Questions
Does lowering the Number of World Objects improve FPS in X-Plane 11?
In my test over New York City using a Cessna 172, lowering the Number of World Objects made a noticeable difference. With the setting on High, I was getting around 18–20 FPS. After changing it to Low, the frame rate increased into the high 20s and sometimes reached the 30s. The trade-off is having fewer scenery objects, but on my laptop the performance improvement was noticeable.
Do clouds affect FPS in X-Plane 11?
They can. I tested this by flying a Cessna 172 around New York City in Clear and Scattered weather. With Clear skies, I experienced around 17–20 FPS, compared with around 15–19 FPS with Scattered clouds. The difference wasn’t very large in my test, but Clear weather performed slightly better.
Does reducing AI aircraft improve performance?
It made a small difference during my test at JFK Airport. While using a Boeing 737-800 with five AI aircraft, I experienced around 15–19 FPS. After reducing the number of AI aircraft to two, the frame rate improved into the low 20s. There was also less ATC activity because fewer AI aircraft were present.
Should I turn off AI aircraft completely on a budget PC?
Not necessarily. I prefer finding a balance between performance and realism. In my test, reducing AI aircraft from five to two improved performance slightly while still leaving some AI traffic and ATC communication in the simulator.
Can X-Plane 11 run well with integrated Radeon graphics?
It depends on the hardware, location and settings. On my Ryzen 7 laptop with 16 GB of RAM and integrated Radeon graphics, X-Plane 11 can provide a playable and enjoyable experience when the settings are adjusted. Dense locations such as New York City and JFK can lower the frame rate, while reducing demanding settings can improve performance.
Can a laptop stand help when running a flight simulator?
I use a laptop stand to raise my laptop above the desk and provide more open space underneath for airflow. When my room temperature stays below around 27°C, I usually see laptop temperatures in the low 60s°C and sometimes in the 50s°C while running X-Plane 11. I use the stand as part of keeping my setup well ventilated during longer sessions.
Summary: Building a Reliable Baseline and Customizing Further
Starting with a clean slate helped me see where the real performance took a hit. Setting up from a basic configuration, devoid of unnecessary flair, gave me a strong foundation to work with. It was like beginning with a blank canvas, ensuring every tweak mattered.
From there, gradually tweaking one setting at a time allowed me to really see the impact of each change. This method was key in avoiding the pitfalls of lag and stutter that could easily creep back with a careless click. By tweaking settings one by one, you’re effectively tuning your simulator for both today’s performance and tomorrow’s upgrade possibilities.
What I discovered is that there’s no one-size-fits-all when it comes to optimizing a flight sim on budget hardware. Every laptop or PC might react differently, so finding your perfect settings combo is part of the flight sim journey. This process turns into an adventure on its own, providing a deeper connection with your platform and often surprising you with its potential.
Improving FPS is only part of the picture. I also tested what playable versus comfortable FPS actually feels like during a complete X-Plane 11 flight from Toronto to Ottawa.
The goal here isn’t achieving the highest possible settings but rather a balance that ensures a pleasurable and responsive flying experience. With these tweaks, you’re empowering your hardware to deliver more than you might have thought possible, avoiding unnecessary frustration and embracing the joy of flying.
This is really helpful for anyone trying to get better flight sim performance without spending a lot on new hardware. I especially like the focus on settings tweaks, because sometimes a few adjustments can make a noticeable difference. In my experience, lowering a few demanding settings while keeping the important visual details can give a much smoother experience. Which of these tweaks do you think makes the biggest difference on budget PCs?
Hi Mala,
Thanks again for sharing your experience. I totally agree that lowering a few demanding settings can improve performance without significantly affecting visual quality. For me, lowering some settings did not make much difference in how the scenery or aircraft details looked.
From my observation, lowering World Objects from Maximum to High made a huge difference, especially around large airports and dense cities, even with clouds. Reducing anti-aliasing to 2x also made a noticeable difference and put less stress on my laptop.
It’s all about finding the right balance between visual quality and smooth performance.
I think the biggest improvement can vary depending on the PC and simulator, so my advice is to experiment with one setting at a time is the best way to find the right balance.
I spent all afternoon trying to get these settings working because I’m determined to practice the flight route before taking the kids on our big December trip to visit my family in Mexico! Since I hardly ever get out of the house these days, seeing those smooth frame rates make the virtual flight feel like my little temporary escape. Lowering the ground traffic settings made such a huge difference on my computer, so now I can finally fly over Guadalajara without the whole screen freezing up on me!
Hi Leah,
Thanks for sharing your experience. It’s good to hear that lowering ground traffic made such a noticeable difference on your computer. That shows how changing just one demanding setting can sometimes improve performance a lot without ruining the overall experience.
I noticed something similar in X-Plane 11 when lowering settings such as World Objects and anti-aliasing. It reduced the stress on my laptop while still keeping the scenery enjoyable.
Flying over Guadalajara sounds like a great way to practice before your December trip. I hope the smoother performance makes the virtual flights even more enjoyable!
This is a really useful topic, especially for people trying to enjoy flight sims without upgrading to expensive hardware. I’m curious which setting usually gives the biggest performance improvement without making the graphics look noticeably worse. Do you think lowering shadows or reducing render scaling makes the biggest difference on a budget PC?
Thanks, Lisa. In my experience, lowering shadows is usually one of the first settings I would try because it can improve performance without making x-plane 11 look dramatically worse.
Render scaling can also improve performance, but lowering it too much may make the image look softer. Based on my own testing, I would try reducing scenery shadows first before lowering render scaling too far.
On my Lenovo laptop, I unticked “Show shadows on scenery,” and I noticed an improvement in FPS. The aircraft shadow also looked sharper, so for me this setting gave a good balance between performance and visual quality.
Hi MElamin
I really enjoyed this post. I like that you focused on getting better performance without immediately telling people to buy new hardware. The test with World Objects was especially interesting. Going from around 18–20 FPS to the high 20s just by lowering that setting is a pretty good improvement. I also agree with the idea of changing one setting at a time. It makes it much easier to see what is actually helping. The tip about keeping the laptop cool is easy to overlook too. I think a lot of people focus only on graphics settings and forget about temperature and background apps.
I’m curious about the render scaling settings. How much can you lower it before you start noticing a big drop in image quality?
Thanks for sharing.
Makhsud
Hi Makhsud,
Thanks for sharing your flight sim experience. I agree that changing one setting at a time makes it much easier to see what is actually improving performance.
For render scaling, I noticed a slight drop in image quality when lowering the setting, but it was still usable and the performance improvement can make the tradeoff worthwhile on a budget PC. If it is lowered too much, cockpit instruments, text, and distant scenery can start looking noticeably softer or blurry.
I think the best level depends on the simulator, screen resolution, and the user’s preference, so I would recommend lowering it gradually and comparing both FPS and image quality.
The article offers a practical, experience-based approach to optimizing X-Plane 11 on budget hardware, with a strong emphasis on balancing visual quality and consistent performance. I particularly appreciate the recommendation to change one setting at a time, since that makes it much easier to identify which adjustments actually improve FPS. The real-world comparisons involving world objects, clouds, AI traffic, shadows, and cooling also make the advice more useful than simply relying on system requirements. Overall, it provides a thoughtful reminder that a smooth and enjoyable simulation experience is more important than maximizing graphical settings
Hi Kavitha,
Thanks for your thoughtful comment. I agree that changing one setting at a time makes it much easier to see what is actually helping performance.
From my own testing on my Ryzen 7 laptop with integrated Radeon graphics, I found that settings such as World Objects, anti-aliasing, clouds, AI traffic, and shadows can all affect FPS differently depending on the situation. These settings work well for my system, but other laptops may perform differently depending on the hardware and simulator setup.
That’s why I focus more on finding a balanced setup that keeps the simulator smooth without sacrificing too much visual quality. For me, consistent performance is more important than simply pushing every graphics setting to the maximum.