
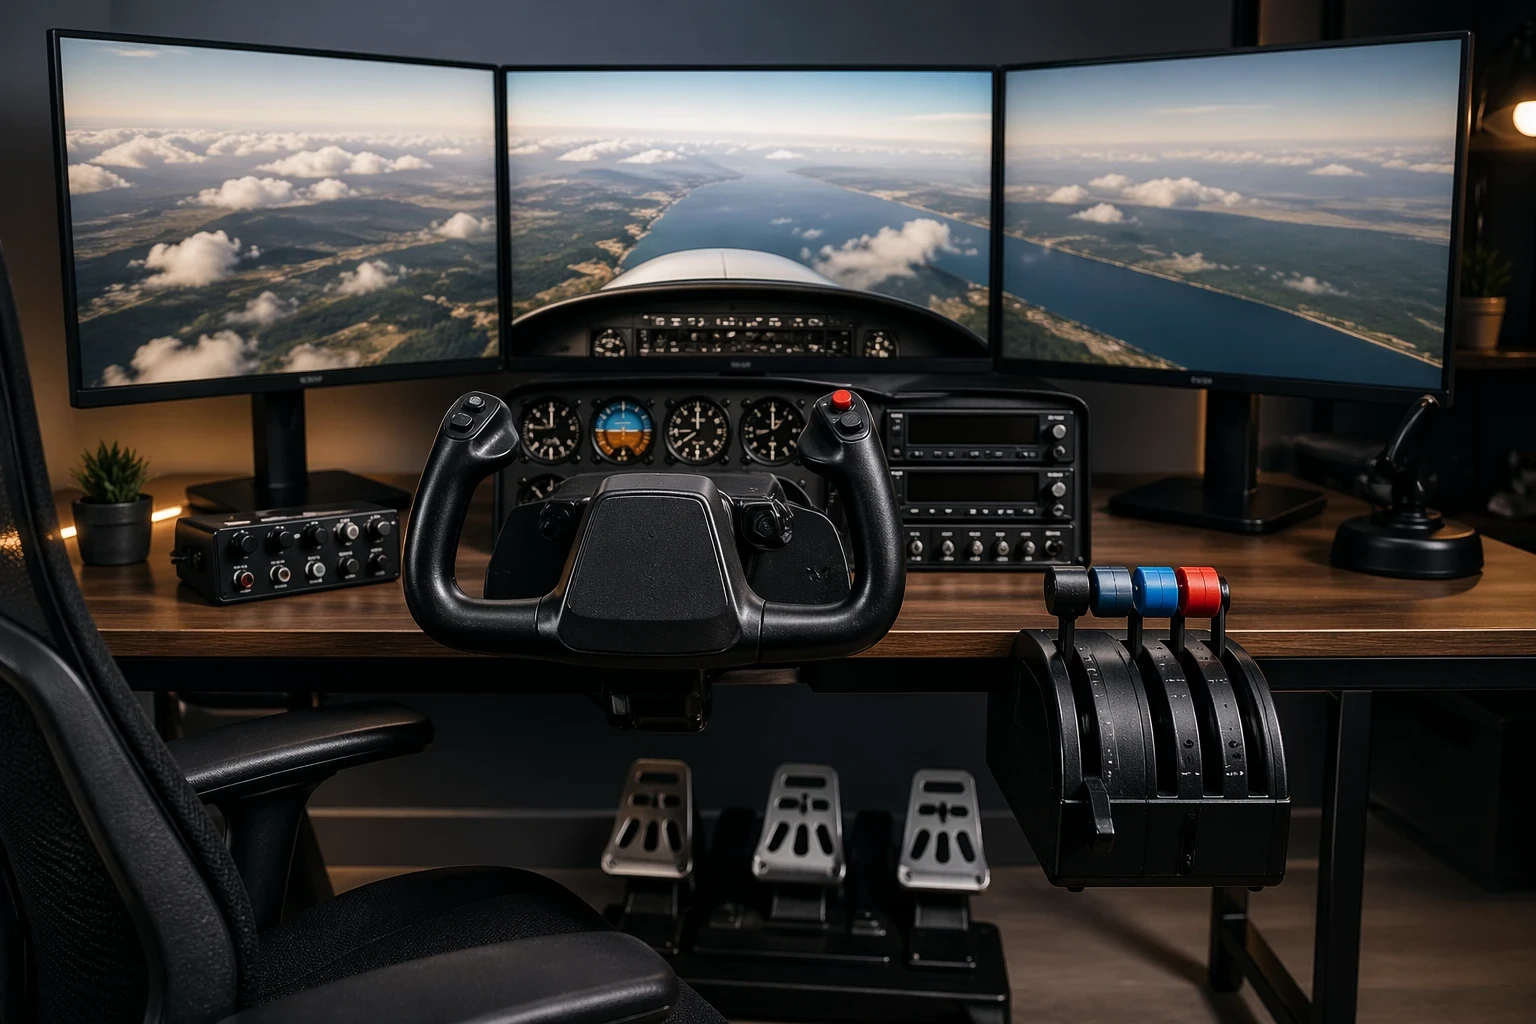
A flight control yoke is one of the most important parts of a flight simulator setup. It controls pitch and roll, which directly affects how the aircraft climbs, descends, and aligns during landing. If the yoke isn’t configured properly, even simple maneuvers can feel unstable or difficult to manage. For a broader look at how cockpit components work together, see building a DIY flight simulator cockpit on a budget.
Start by understanding the role of the yoke. It controls pitch through the elevator and roll through the ailerons. When both are configured correctly, the aircraft responds more predictably during all phases of flight.Properly configuring the yoke directly affects how your aircraft climbs, descends, and aligns during landing. So, it’s worth taking the time to get it set up right.
Before getting too far ahead in button mapping and sensitivity settings, you need to ensure that your shiny new yoke is compatible with the flight simulator you use. We’re talking about the big guns here—X-Plane 12, Microsoft Flight Simulator 2024, or any other major simulator. You want to double-check that your yoke is recognized and fully supported by the software. Download and install all necessary drivers, updates, and make sure the simulator acknowledges the yoke’s presence. You can also review general flight simulator setup requirements and compatibility considerations from this external guide.
Check the manufacturer’s documentation, official forums, or support pages to confirm that proper drivers and calibration tools are available. Without full support, the yoke may behave inconsistently or fail to respond correctly.
Aligning everything with your flight simulator ensures you’re not fighting against your setup. Once you’ve confirmed your yoke is a good match for your simulator software and everything’s communicating nicely, you’ll make light work of takeoffs and landings. For additional guidance on improving control accuracy and realism, you can also explore custom joystick configurations and control setup techniques.
Initial Calibration and Setup for Optimal Functionality
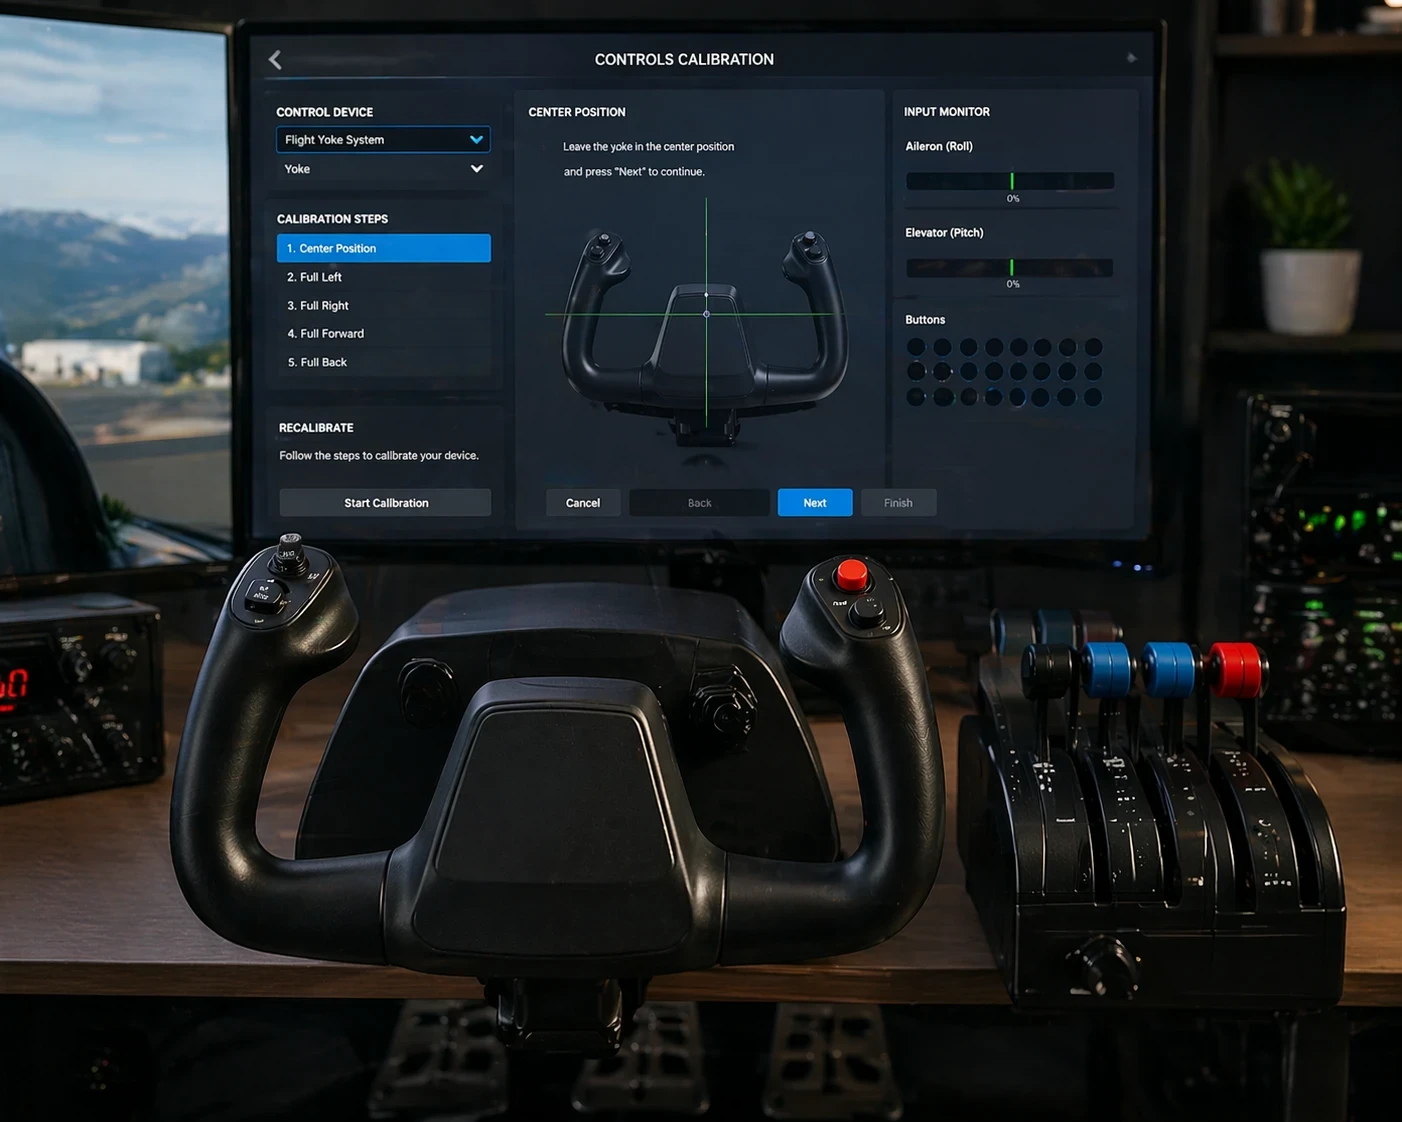
Calibration is the first step in setting up a flight control yoke. It ensures the simulator correctly detects the center position, full range of motion, and input accuracy for smooth and consistent control. In practice, taking the time to move the controls slowly through their full range can make a noticeable difference. Even small calibration improvements can reduce unwanted drift and make the aircraft feel more stable during flight.
Begin by connecting your yoke to your computer and launching your chosen flight simulator. Each simulator has its own process, but typically you’ll head to the settings or options menu and find the calibration tool under controls or input devices.
Follow the prompted steps to set the center position by releasing the yoke, then gently moving it through its full range of motion. Think of it as stretching before a workout—make sure you reach each corner to establish maximum deflection limits. Skip this and your plane may not react predictably, resulting in that dreaded drift or jerky motion.
Also, be aware of some rookie mistakes. A common one is rushing through this step, missing those full sweeps of the yoke arcs. It leads to limited range movement that’s not representative of what the yoke can actually do.
Don’t forget about checking the axis alignment. Ensuring that the pitch and roll axes are correctly aligned in the software can prevent inadvertent control crossover, so your inputs mirror real flight dynamics.
With the yoke calibrated and functioning at its intended limits, your simulator will respond naturally to the nuances of your control inputs. It’s the difference between feeling in control and just trying to hang on.
Fine-Tuning Sensitivity and Dead Zones
With calibration out of the way, it’s time to get into the nitty-gritty of sensitivity and dead zones. These two things determine how your aircraft responds when you handle the yoke, and getting them right means you’re one step closer to flying like a pro.
Start with dead zones. These are invisible barriers around the yoke’s center that filter out tiny, unintended movements. If the dead zone is too small, the aircraft may drift when the yoke is at rest. In many setups, slight adjustments to dead zones can significantly reduce this drift. Fine-tuning these values helps maintain stability, especially when hands are off the controls during cruise or final approach. If it is too large, control inputs can feel delayed, leading to overcorrection during flight. The sweet spot is where the aircraft remains stable at rest but responds promptly once you start making moves.
Now, about sensitivity curves. It’s all about how your inputs translate into movements. A linear sensitivity means the controls are direct and precise, but it might feel a bit sharp if you’re trying to finesse a landing. A curved response can make your inputs feel smoother when close to the center, perfect for gentle adjustments during approach and flare.
Sensitivity settings determine how quickly the aircraft reacts to your inputs. Adjusting these settings helps achieve smoother control, especially during approach and landing. Start by experimenting with different settings: try something like a dead zone of 5-10% and adjust the sensitivity from there, based on how you like your flight experience. From experience, adjusting sensitivity curves and dead zones gradually—rather than making large changes at once—helps achieve smoother control without overcorrection, particularly during landing.
Remember, the goal is to achieve a balance that feels natural and keeps you in control whether you’re on the ground or gliding through the clouds. Regular testing and adjusting as you familiarize yourself with different aircraft types will help you tailor these settings to perfection.
Customizing Controls and Mapping for Efficiency
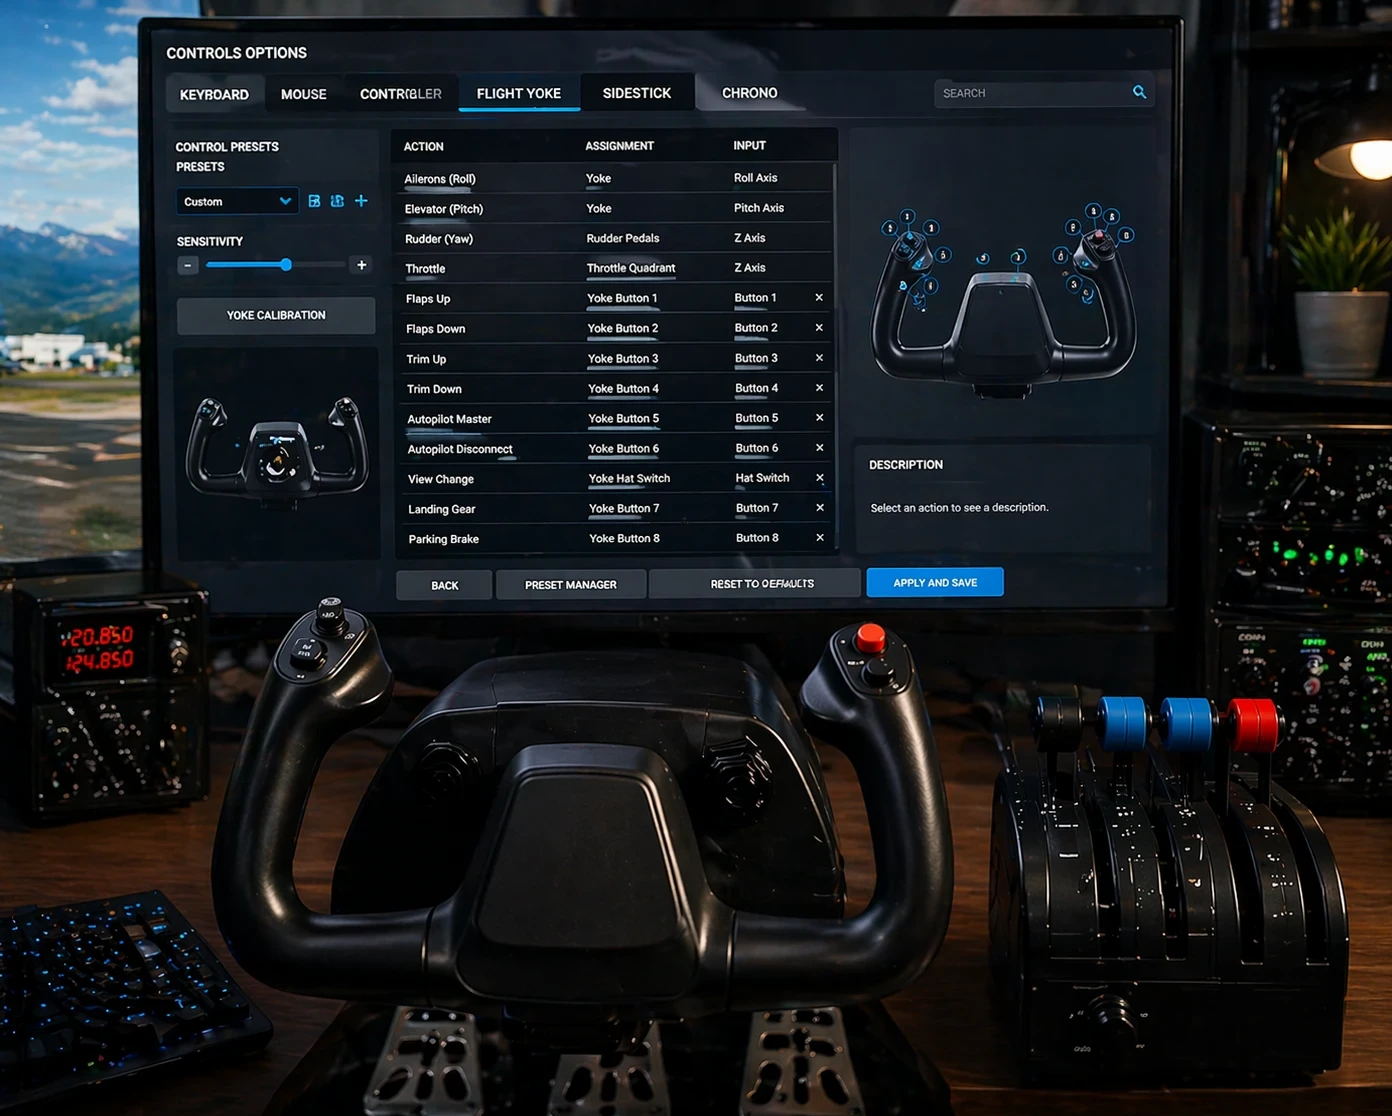
Control mapping should be organized so that essential functions are easy to access during flight. This reduces reliance on the keyboard and improves overall workflow. When you’re in the middle of a flight, especially if things start to go sideways, you need to access essential controls without fumbling for the keyboard or squinting at the screen.
Begin with mapping high-frequency controls onto your yoke’s buttons. Essentials like trim adjustments, autopilot disconnect, and flaps should be at your fingertips. Each of these functions is crucial during different phases of flight, so having them easily accessible can significantly enhance your reaction time.
Make sure pitch and roll are assigned correctly. Associating pitch to the yoke’s forward and back movements and roll to its side-to-side motions sounds basic, but if they’re mixed up, you’ll end up with some unpredictable aircraft behavior that’s not fun to deal with!
Don’t overlook the common mapping mistakes. Beginners often overlook functions like view controls, which allow quick visual adjustments—a game changer when taking in the surroundings or checking your landing alignment.
As you navigate through the control mapping, remember it’s about making your virtual cockpit as intuitive as possible. Efficient mapping means you spend less time wrestling with controls and more time enjoying the flight experience. Plus, it just feels right when everything is comfortably under your command.
Troubleshooting and Fine Adjustments
Initial setup is not always final. Fine adjustments and troubleshooting are often required to ensure consistent and stable control performance. It’s not uncommon to run into issues or quirks that require a little extra attention.
One of the most common problems is control drift. This is often noticeable during straight and level flight, where even a slight imbalance in settings can cause the aircraft to slowly veer off course.You might notice your aircraft veering off course when the yoke is at rest. This is usually due to poorly set dead zones or calibration errors. Revisit those settings and make sure everything is aligned correctly to keep your aircraft on track.
Overcorrection can also be a real pain, often caused by sensitivity settings that are too high. Reducing sensitivity slightly and testing the response in small increments can help create a more controlled and predictable handling feel.If you find yourself constantly wrestling the controls, dial back the sensitivity just a notch. It’s about finding that sweet spot where your inputs feel just right.
Delayed response can take the fun out of smooth flights, often stemming from improper curve settings. Experiment with adjusting the sensitivity curves to get smoother, more predictable control throughout the yoke’s range of motion.
Different types of aircraft can also have unique control needs. A general aviation plane is usually more nimble, requiring different sensitivity compared to an airliner, which responds slower due to its size and weight. Don’t be afraid to tweak settings based on what you’re flying at the time. For a deeper breakdown of how control behavior changes between aircraft types, you can explore customizing your flight simulator for specific aircraft and control realism.
Take a systematic approach to troubleshooting. Tackle one issue at a time. It helps keep things clear and avoids introducing new problems while you’re fixing others. In the end, refining your setup means more enjoyable flights, free from constant surprises and frustrations.
✈️ Put Your Yoke Setup Into Practice
A properly configured flight control yoke can make a noticeable difference in how your simulator feels and performs. From calibration to sensitivity tuning and control mapping, each step plays a role in creating smooth, predictable handling during all phases of flight.
Instead of rushing through the setup, taking the time to fine-tune each setting will help you avoid common issues like drift, overcorrection, or delayed response. Small adjustments often lead to the biggest improvements.
If you want to explore more setup guides, hardware tips, and practical flight simulation advice, you can visit the Flight Sim Essentials main page to find additional resources that support your cockpit and control configuration.
🔧 Continue Refining Your Setup
Yoke configuration isn’t something you set once and forget. As you test different aircraft and flight conditions, your settings will naturally evolve.
Focus on making gradual adjustments, keep your layout efficient, and prioritize control consistency over complexity. Over time, these refinements will help you achieve a more stable and responsive flight experience.