
Last updated on April 4th, 2026 at 10:07 pm

Virtual flight simulators are a popular way to build confidence in flying without the risks of real-world scenarios. Whether you are new to the concept or a seasoned gamer looking for an aviation challenge, your first virtual takeoff and landing experience offers plenty to learn. This article walks you through a step-by-step process, explains important controls, and provides tips on successfully taking off, flying, and landing in a simulator environment. Before you begin, check out our Getting Started With Flight Simulation: A Step-by-Step Guide to make sure your setup is ready.
✈️ My Cessna 172 Practice Flight – Toronto Pearson (6R) to Billy Bishop (Runway 26)
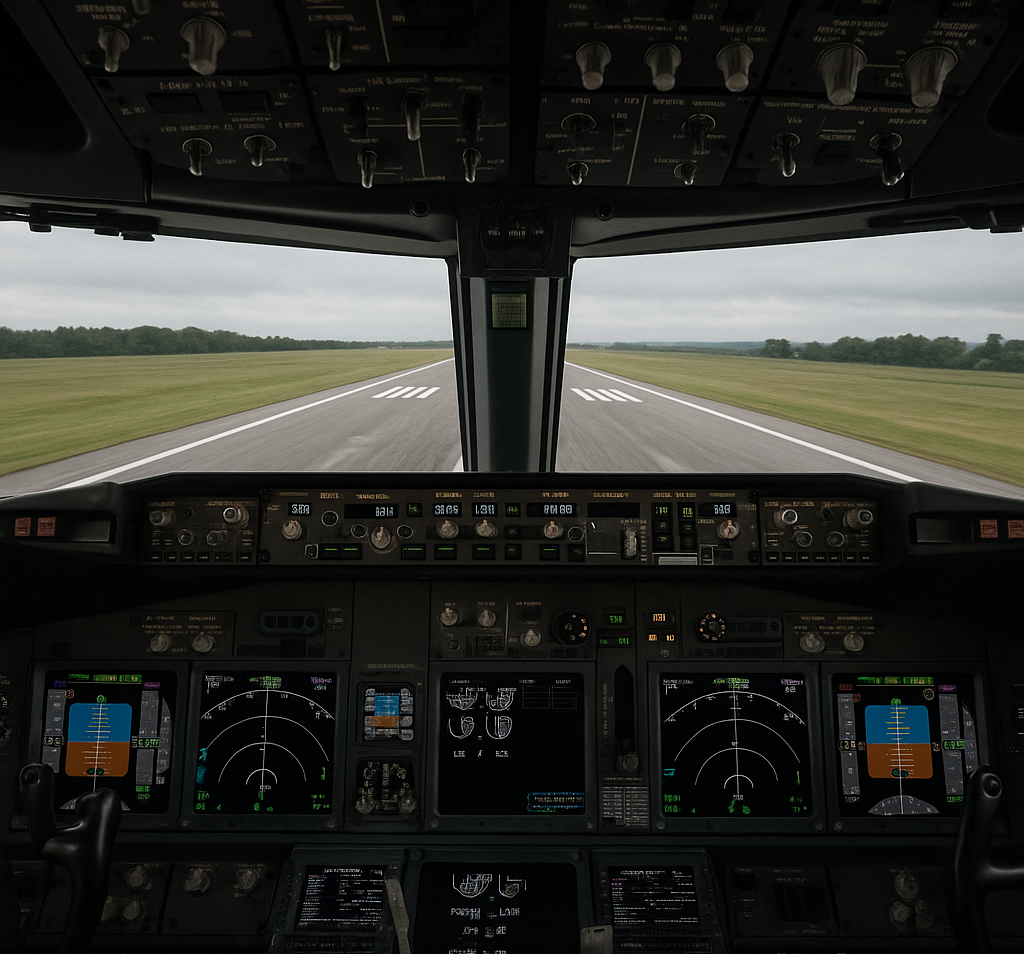
This is one of the short practice flights I completed in X-Plane 11 to build confidence with basic takeoff and landing procedures. I selected the Cessna 172 Skyhawk and took off from Toronto Pearson Airport using Runway 6R. After setting the flaps for takeoff, I pushed the throttle forward and lifted off smoothly, climbing to about 2,500 feet before beginning my descent toward downtown Toronto.
As I approached Billy Bishop Airport, I reduced the throttle to around 50% to manage my speed and kept adjusting the aircraft to stay aligned with Runway 26. The landing was a little rough, but still manageable, and it gave me a better understanding of how the Cessna reacts during the final approach. After touchdown, I taxied over to the parking area to complete the flight.
Short hops like this are perfect for beginners—they’re quick, forgiving, and help you practice takeoff, descent, and landing without the pressure of a long flight.
Beginner Tip:
If you’re new to flight simulation, it’s a great idea to practice takeoffs and landings in the Cessna 172 before moving on to larger aircraft. The Cessna is stable, predictable, and forgiving, which makes it easier to understand how throttle, pitch, and flaps affect the aircraft during each phase of flight. You can repeat these short practice flights as many times as you like, and once you feel comfortable handling the Cessna, transitioning to something larger—like the Boeing 737—becomes much easier. Building strong fundamentals in a small aircraft gives you the confidence you need when you eventually fly more advanced jets.
Get to Know Your Controls

Before you jump into the virtual cockpit, it’s a good idea to get comfortable with the basic flight controls. These include the throttle (for speed), ailerons (for rolling the wings), rudder (for steering), and elevators (for climbing or descending). Most flight sims offer tutorials—definitely take advantage of those. They’ll help you understand how everything reacts so you’re not overwhelmed once you’re airborne. Our Glossary Of Flight Simulator Terms For Beginners can help you understand these controls more easily.
Most flight simulators include structured tutorials that introduce the basics of aircraft handling and navigation before moving on to more advanced concepts.
Pre-Flight Checklist and Simulation Settings
Just as real pilots follow a pre-flight checklist, virtual pilots should complete one before each session. If you’re flying larger aircraft like the Boeing 737, it’s also important to understand how to set up the flight route before takeoff. If you’re new to it, take some time to learn how to program the Flight Management Computer before your flight. Check essential settings such as flaps for takeoff, fuel or battery charge levels, and verify that navigation and communication systems are properly set. Many simulators allow adjustments to realism settings. For your very first flight, choose beginner-friendly options and reduce weather complexity and instrument sensitivity so that the learning curve is smoother. You can learn more about configuration options in our guide: Essential Software And Tools For Novice Pilots.
Here is a quick checklist to get you started:
- Check throttle settings and control calibration
- Set flaps and trim for takeoff
- Review fuel or energy levels
- Confirm that navigational aids are active
- Adjust difficulty to a beginner level
This structured list minimizes the chance of missing an important step.
Pre-flight checks help you catch configuration issues early, even in a simulator. It’s simply good practice before taking off.
Staying Aligned and Smooth on the Throttle

With your pre-flight checklist done, line up your aircraft with the runway’s centerline. Use the visual cues in your simulator to help you stay centered. Then, slowly push the throttle forward—steady acceleration is key. Don’t rush it. The goal here is a smooth takeoff, not a race. On-screen indicators help you track your progress to ensure a stable acceleration and proper control.
Rotation and Lift-off
Once the takeoff speed is reached, it is time for rotation—that is, gently pulling back on the controls to raise the nose of the aircraft. Getting the timing right for this action is very important. Pulling too early can result in insufficient lift. Pulling too late may risk a rough landing. Practice in the simulator until you find the perfect moment to rotate. When the nose lifts and the aircraft begins to leave the runway, you’ll experience a rewarding transition from ground roll to flight.
Initial Climb and Post-Takeoff Procedures
Once your aircraft is safely off the ground and climbing steadily, it’s time to handle a few key tasks. First, retract the landing gear to reduce drag. Then, bring the flaps back to their original position to allow the aircraft to maintain a clean aerodynamic profile during climb.
Many simulators also include ATC (Air Traffic Control) options. At this stage, you’ll typically switch to departure frequency and check in with ATC. This helps simulate real-world communication and adds an extra layer of realism to your virtual flight. If it feels complex at first, focus on one task at a time—such as maintaining heading or controlling speed—rather than trying to manage everything at once.
If you’re ready to explore structured radio calls, clearances, and how ATC can transform your virtual flights into full training scenarios, check out our guide on Implementing ATC Communication For Dashboard Realism.
Before initiating takeoff, be sure to receive clearance from ATC if you’re flying in a simulator that includes air traffic control features. This adds realism to your experience and ensures your takeoff is properly coordinated with any other virtual traffic.
Standard radio call procedures help keep virtual traffic organized and add realism to your flights.
Climbing and Managing Altitude
After becoming airborne, maintaining a steady climb is the next challenge. Keep a close eye on altitude, vertical speed, and airspeed indicators. Small, constant adjustments to the controls help you maintain the correct climb rate and avoid overly steep angles that could destabilize the aircraft. With practice, you will gain a feel for making these subtle corrections steadily. Learn more about this concept in Understanding The Basics Of Aerodynamics In Simulators.
Communication with ATC (Air Traffic Control) is also important at this stage. It helps guide your aircraft through controlled airspace, keeps you aware of nearby traffic, provides weather updates, and allows you to report any technical issues or abnormalities.
Managing altitude is less about one dramatic move and more about small, continuous corrections that keep the aircraft stable and on the correct flight path.
🧠 Using Autopilot for Climb and Altitude Control (Real Experience)
While practicing climbs in the Boeing 737 in X-Plane 11, I initially thought that setting an altitude—like 10,000 feet—was enough for the aircraft to climb automatically. However, I quickly realized that the autopilot doesn’t work that way, especially compared to simpler simulator behavior, as you’ll notice when learning more advanced systems like the Flight Management Computer.
At first, the aircraft would not adjust to the selected altitude properly, which made it seem like the autopilot was not working. After testing different setups, I found that the issue was not the autopilot itself, but how I was using it.
The key difference came down to speed and thrust management.
Before takeoff, I started setting:
- A target speed
- Autothrottle (A/T) armed
Once I did this, the behavior changed completely. After takeoff, when I turned on the autopilot and selected a climb mode, the aircraft was able to climb smoothly and capture the selected altitude without issues.
This showed me that:
- Autopilot does not control everything by itself
- It depends on proper speed and thrust to function correctly
If speed is too low or thrust is not managed properly, the aircraft may struggle to climb or fail to stabilize at the selected altitude.
Beginner Tip:
If your aircraft is not climbing or holding altitude properly, check your speed and throttle settings first. In larger aircraft like the 737, the autopilot works together with autothrottle and pitch control. Setting up speed before takeoff can make a big difference in how smoothly the aircraft climbs and levels off.
Approach and Landing: The Final Phases
Approaching the runway tests your precision and control. Begin your landing with a stable, aligned approach, using the simulator’s visual guidelines to help you. As you descend, gradually reduce your speed and, if necessary, deploy the flaps to manage your descent rate.
Communicate with ATC to select the appropriate runway and receive guidance for landing. Once permission is granted, follow ATC instructions closely to maintain proper spacing and alignment with other traffic. This adds realism and helps you develop proper radio communication habits used in real-world aviation.
Monitor your instruments closely as you near the runway. When it becomes time, lower the landing gear and fine-tune your descent. Aim for the main landing gear to make contact with the runway first. Once that happens, gently lower the nose and continue reducing the throttle to ensure a smooth landing. This phase is critical in building your confidence and refining your piloting skills. If you’re having trouble landing, you might be making some of the Common Mistakes New Flight Simulator Users Make.
✈️ My Boeing 737-800 Flight – Toronto Pearson (06R) to Ottawa (Runway 07)
Here’s a full flight I completed in X-Plane 11 that really helped me understand descent, speed control, and approach handling in a larger aircraft.
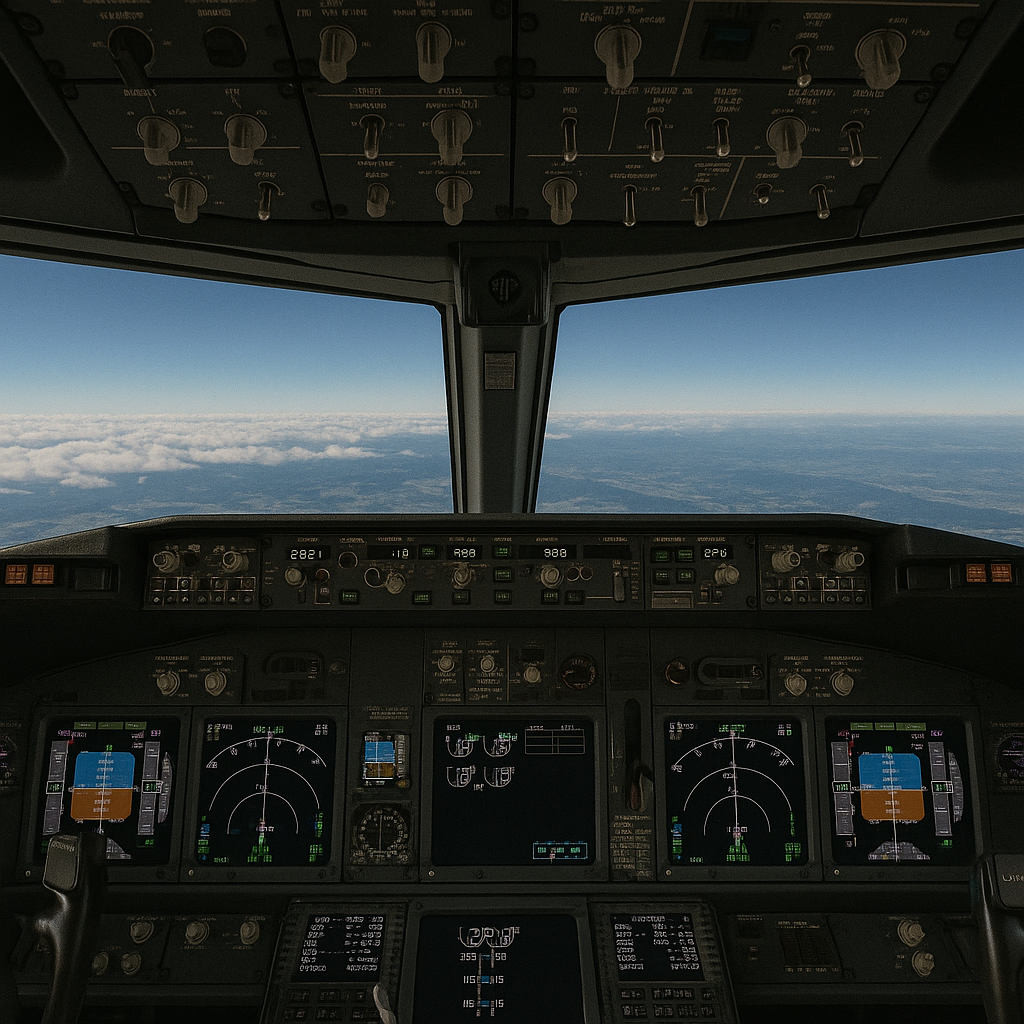
I departed from Toronto Pearson International Airport using Runway 06R in the Boeing 737-800. Before takeoff, I configured the aircraft by setting the flaps, turning on the appropriate lights—including strobe and taxi lights—and releasing the parking brake before lining up on the runway. After takeoff, I climbed and leveled off at 25,000 feet, maintaining a cruising speed of around 280 knots. At this stage, everything felt stable and under control.
As I began my descent toward Ottawa, I gradually reduced altitude to 9,000 feet and brought the speed down to about 200 knots. This made the aircraft easier to manage compared to descending too fast at higher speeds.
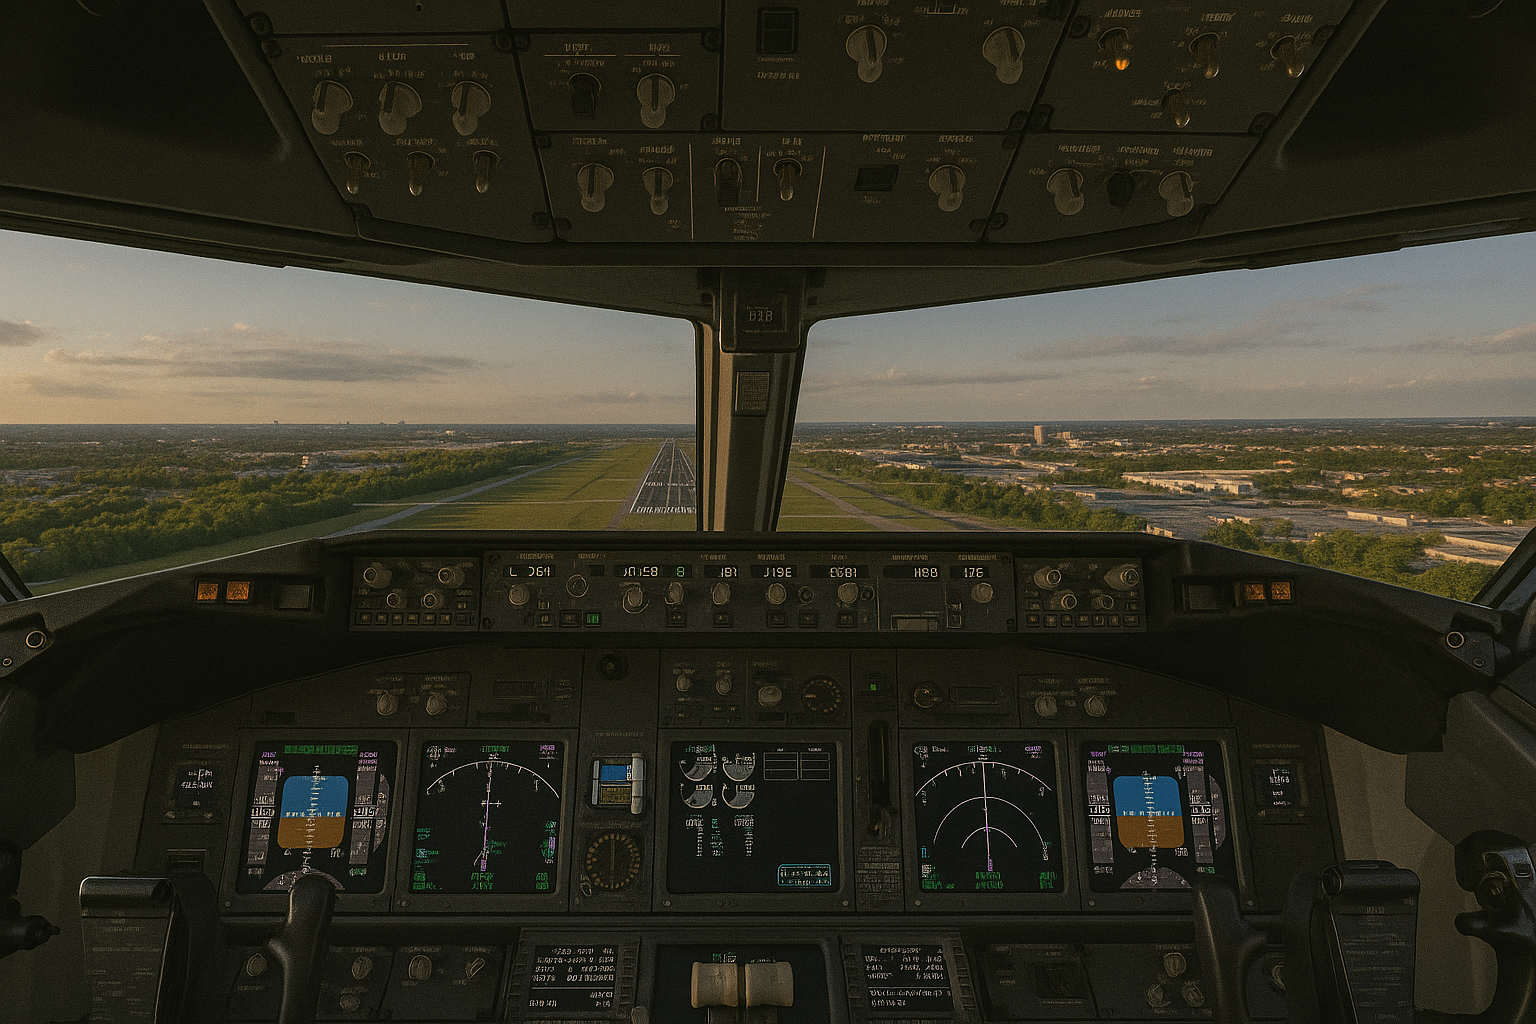
On approach, I continued descending below 3,000 feet and reduced speed further to around 160 knots. During this phase, I started deploying the flaps in stages and made sure the landing lights were on, which helped stabilize the aircraft and improve visibility while lining up with the runway.
⚠️ Autopilot and VNAV Lesson (Important)
During the approach, I tried using VNAV, expecting it to manage the descent automatically. However, the aircraft began descending too aggressively, so I disabled it.
I then attempted to use the APP (Approach mode), but it didn’t capture the glide path properly. The aircraft started descending toward the ground too quickly, and I received a “SINK RATE” warning.
From my experience, this happened because:
- The aircraft was not properly established on the approach
- The altitude was set too low (2,000 feet) before intercepting the glide slope
- APP mode was activated too late
✅ Manual Correction and Landing
Instead of relying on autopilot, I took manual control using the joystick:
- Adjusted pitch to stabilize the descent
- Maintained proper alignment with the runway
- Controlled speed carefully during final approach
Even though the approach wasn’t perfect, I managed to correct the descent and land safely on Runway 07 in Ottawa. After touchdown, I reduced speed further, completed the rollout, and once I reached the terminal area, I applied the parking brake to secure the aircraft.
💡 What I Learned From This Flight
This flight taught me a few important things:
- VNAV is not always reliable on short or late approaches
- APP mode only works properly when you are correctly aligned and at the right altitude
- Speed control is critical during descent
- Manual flying skills are essential when autopilot doesn’t behave as expected
Beginner Tip:
If autopilot or approach mode is not working as expected, don’t panic. Take manual control, stabilize your speed and descent, and focus on aligning with the runway. In many cases, a controlled manual landing is safer than forcing the autopilot to work.
Post-Landing Procedures and Ground Control
After achieving a smooth touchdown, the simulation isn’t complete. Reduce the throttle gradually and begin taxiing toward the virtual ramp or gate. In this phase, you get familiar with ground control and other post-flight procedures such as engine shutdown and, in some cases, simulated radio communications with ground personnel. Use this period as an opportunity to assess your performance and consider improvements for your next flight.
✈️ From FSX to X-Plane 11: How a Joystick and a New Laptop Improved My 737 Landings
When I first practiced takeoffs and landings in Flight Simulator X, I quickly realized how difficult flying with a keyboard was. Switching to a joystick made control easier—especially during flare and touchdown—but larger aircraft in FSX still felt unpredictable and required constant corrections.
After upgrading my old laptop, I revisited modern simulators to see how they compared. I had already noticed from recent YouTube videos that newer sims look smoother and handle more realistically, and once I tried them myself, the difference was immediate. With the better hardware and clearer visuals, the joystick inputs felt more natural and the aircraft reacted more steadily.
One of my first tests in X-Plane 11 was a full approach and landing in the Boeing 737. On long final, the runway stayed clear in view, the descent rate was easy to manage, and small joystick adjustments kept the aircraft centered without fighting lag. On short final, everything lined up smoothly, and the touchdown was far more controlled than what I was used to in FSX.
Taxiing felt just as realistic. The aircraft stayed centered on the taxiway, and X-Plane’s ground handling made the rollout and gate parking feel natural from start to finish.
Switching from FSX to X-Plane 11—combined with a joystick and a more capable laptop—made a dramatic difference in how quickly I improved with larger aircraft. Even after a few retries, the smoother performance and more accurate flight dynamics helped build confidence faster. Every successful landing now feels like real progress.
Advanced Tips and Tricks
Once you have mastered the basics, you can explore more advanced techniques to boost your flight simulation experience. Experiment with different control sensitivity settings until you find one that suits your personal style and makes the aircraft feel more responsive.
It can be very useful to get a deeper understanding of flight dynamics by studying how various settings affect lift, turbulence, and handling in different wind conditions. Use simulator replays to review your flights, spot any mistakes, and adjust your game plan for future sessions.
Remember, continuous practice is very important. Increasing the difficulty gradually or trying different weather conditions will challenge you and help improve your instincts and decision-making over time. You may also want to look into hardware upgrades—see our post on How To Set Up Your First Custom Flight Simulator.
Helpful Tools and Resources
There is a wealth of resources available to lift up your virtual flying skills. Online communities and forums like like AVSIM and FlightSim.com are full of pilots sharing their tips and practical insights that go beyond the simulator instructions. Books and video tutorials on flight dynamics and aircraft behavior can also add valuable context to your practice sessions.
In addition, do not overlook companion apps associated with your flight simulator. Some of these apps offer flight charts, updated weather data, and detailed airport maps, all of which help you prepare effectively for each virtual flight.
Want a full list of trusted forums and resources? Don’t miss our guide to top flight sim communities and support hubs that can elevate your sim journey even further.
Personal Note:
These guidelines offer a strong foundation for setting up a successful takeoff and landing in a flight simulator. If you want to dive deeper into virtual takeoff and landing procedures, I highly recommend starting with Microsoft Flight Simulator. Personally, I began my journey with Flight Simulator X, and I found that the built-in lessons were clear and easy to follow.
When I practiced takeoffs and landings in X-Plane 11, there was no ATC communication since I was flying offline and not using any plugins. This made the flight simpler and less structured, but still very useful for practicing approaches, throttle control, and runway alignment. ATC is optional in many simulators, so beginners can choose whether they want that added realism or prefer to focus on flying first.
Newer programs like Flight Simulator 2024 and X-Plane 12 also provide excellent training environments, but from my experience, Microsoft’s platform is still one of the best places for beginners to build real skills and confidence.
Frequently Asked Questions
Question: How do I know when to rotate during takeoff?
Answer: Rotation speed varies depending on the aircraft, but most simulators display it in the aircraft specs or tutorial missions. For beginners, focus on accelerating smoothly, staying aligned on the runway centerline, and gently pulling back when you reach the recommended takeoff speed. After a few attempts, you’ll start to recognize how small control inputs affect the aircraft, making each phase of flight easier to manage.
Question: Why does my aircraft drift left or right during takeoff?
Answer: Drifting usually happens because of wind, torque, or over-controlling the rudder. Use small, gentle rudder inputs rather than big corrections. Staying relaxed and making tiny adjustments helps you maintain a straight rollout.
Question: How can I make my landings smoother?
Answer: A smooth landing comes from a stabilized approach: consistent speed, steady descent rate, and proper alignment with the runway. Reduce power gradually, use flaps as needed, and aim to touch down with the main landing gear first. Avoid rushing or pulling back too hard at the last second.
Question: I get nervous during landing. How can I build confidence?
Answer: Start with clear-weather landings, daylight conditions, and beginner-friendly aircraft like the Cessna 172. Repeat the same airport and runway several times until the process feels familiar. Consistency removes uncertainty and builds confidence quickly.
Question: Do I need to understand every aircraft system to take off and land?
Answer: No. Beginners only need to understand basic controls: throttle, elevators, rudder, flaps, and trim. As you gain experience, you can add more systems gradually—there’s no need to learn everything at once.
Question: What settings should beginners use for their first takeoff and landing?
Answer: Use simplified realism settings, calm weather, and minimal turbulence. Beginners learn faster when the environment is forgiving. You can increase realism later as your comfort improves.
Question: How can I practice without getting overwhelmed?
Answer: Choose one small goal per session—such as only practicing takeoff, only practicing landings, or flying short circuits. Breaking the learning process into small steps makes everything easier and reduces frustration.
Question: Why is my autopilot not climbing in X-Plane 11?
Answer: In many cases, the issue is not the autopilot itself but how it is set up. Larger aircraft like the Boeing 737 require proper speed and thrust management. If autothrottle is not armed or speed is too low, the aircraft may not climb or capture the selected altitude properly. Selecting the correct vertical mode, such as Level Change (LVL CHG), is also essential.
Question: Why didn’t APP mode capture the glide slope in X-Plane 11?
Answer: APP mode only works when the aircraft is correctly aligned with the runway and at the proper altitude before intercepting the glide slope. If activated too late or too low—such as below 2,000 feet—it may fail to capture properly and result in an unstable descent.
Question: What should I do if I get a “SINK RATE” warning on approach?
Answer: Reduce your descent rate immediately by gently pulling back on the controls and stabilizing your speed. If needed, disconnect autopilot and continue manually. A controlled manual correction is often safer than relying on automation in an unstable approach.
Final Thoughts: Gaining Confidence One Flight at a Time
Taking off and landing virtually for the first time can feel like a big step—but it’s a rewarding one. Each session helps you learn more about how an aircraft behaves and how you respond to challenges. The best part? You can always pause, reset, and try again. That’s the beauty of flight simulators—mistakes become opportunities. Repeating the same short route or runway helps you quickly spot mistakes and improve consistency.
The simulator is designed to be forgiving. You can reset and try again as many times as needed, which encourages experimentation and skill growth. Regular practice and careful review of your performance will refine your decision-making and problem-solving abilities. Still unsure about which sim suits you best? Read Choosing The Right Flight Simulator For Your Needs.
So, jump into your simulator with beginner-friendly settings and enjoy the thrill of takeoff and landing. Every session turns initial jitters into smooth, confident maneuvers. Keep pushing your skills further with each flight, and remember that consistent practice is the key to improvement. Happy flying, and enjoy every virtual flight experience!
This article is an excellent introduction to virtual flight simulation and a great confidence booster for beginners. It provides a clear, step-by-step approach to mastering your first takeoff and landing, breaking down complex concepts like throttle control, rotation timing, and communication with virtual ATC into manageable pieces. The emphasis on using tutorials, checklists, and beginner-friendly settings is especially helpful for new users. I appreciated the personal experience shared—it reassures readers that challenges are normal and can be overcome with practice. The mention of modern simulators like X-Plane and Microsoft Flight Simulator also highlights how advanced the technology is, offering better support and realism. Overall, this post is not just informative but also encouraging, giving novice pilots the tools and mindset needed to start their journey with confidence. I’m looking forward to applying these tips and exploring more advanced features in future flights.
Hi Andrejs!
I’m really glad the step-by-step guide helped make takeoffs and landings feel more approachable. Modern sims like MSFS and X-Plane definitely make learning smoother with their tutorials and realism. It’s great to hear you’re excited to build on these basics and explore more advanced features.
Starting out in flight simulation was both exciting and intimidating for me. The first virtual takeoff gave a real sense of accomplishment, but landing smoothly took much longer to master. What helped most was breaking down each phase of flight and practicing them separately before stringing everything together. In my opinion, building confidence in a flight sim environment is all about consistency and not rushing progress. Over time, those small wins, like a steady approach or a perfect touchdown, really add up. It’s a rewarding way to build both skill and discipline, even virtually.
Hi Slavisa!
Your experience is very relatable — takeoff feels rewarding early on, while landings take patience and practice. Breaking each phase into smaller skills is a great approach, and those consistent small wins really do build confidence over time.
This guide offers a fantastic starting point for anyone new to flight simulation. The step-by-step approach, from familiarizing oneself with basic controls to executing a smooth takeoff and landing, is both informative and encouraging. I particularly appreciate the emphasis on starting with beginner-friendly settings and gradually progressing as confidence builds. It’s a valuable resource for aspiring virtual pilots looking to embark on their aviation journey
Thanks so much!
I’m glad the guide made the first steps of takeoff and landing feel less intimidating. Starting with beginner-friendly settings and progressing gradually is the best way to build confidence without feeling overwhelmed.
Thank you for a fantastic guide for anyone new to flight simulation. For me, not being experienced at all in flight simulation, the title of this post says it all! It is a very informative article about take-offs and landings. Building confidence seems to be a big word here. Thank you again for a very educational article.
Best wishes,
Kent
Hi Kent,
I’m really glad the guide helped you feel more confident. You’re absolutely right: building confidence is so important, especially when it’s your first time virtually taking off or landing. From my experience, takeoffs feel tricky at first but are a bit easier than landings. With a little practice, it all starts to click. Wishing you the best as you explore the world of flight sim!
This was such an engaging read! I remember my very first virtual takeoff in Flight Simulator X—I was so focused on pulling back at the right moment that I nearly forgot to retract the landing gear afterward. Reading your step-by-step breakdown really brought back that mix of excitement and nerves.
What stood out most to me is how you compared smaller aircraft with larger ones. I had the same experience—starting with a Cessna made me feel more in control, but once I tried landing a 747, I realized just how much precision and patience it takes. That learning curve is humbling, but also what makes simulators so rewarding.
I also appreciated the emphasis on checklists and ATC. It’s those “little” details that transform the experience from just a game into something that actually builds real-world aviation habits. The point about mistakes becoming opportunities is so true—being able to pause, reset, and try again without risk is exactly what makes simulation such a powerful confidence builder.
Have you found that gradually increasing realism settings (like adding weather challenges or more sensitive instruments) helps learners progress faster? Or do you recommend mastering the basics on default beginner settings before stepping it up?
Hi Jannette!
Your first-flight story is very relatable — those early moments always mix nerves with excitement. Starting with smaller aircraft is the best foundation before moving to big jets like the 747. I’d recommend mastering the basics first, then gradually adding realism settings like weather or instrument sensitivity once you feel comfortable. It’s a great way to grow without getting overwhelmed.