
Last updated on February 25th, 2026 at 09:20 am
Building a motion seat involves choosing between different types, and understanding these can totally shape your flight sim experience. Two degrees of freedom (2-DoF) setups move you along the pitch and roll axes, creating a basic yet immersive flight feel. Three degrees of freedom (3-DoF) setups introduce an additional axis of movement, adding another layer of realism.
If you’re still planning your overall rig layout, it pairs nicely with how you arrange your cockpit in Building a DIY Home Cockpit on a Budget and for a real-world look at commercial motion solutions, you can also browse Next Level Racing’s motion platforms what sort of motion travel your frame can realistically support.
Picking between a seat-mover and a full-frame design is another biggie. A seat-mover is all about keeping movement tight to the seat itself, while the full-frame designs bring peripherals like pedals and yoke into play, moving everything in unison. Each approach delivers a noticeably different experience, depending on how immersive you want your setup to be.
For those who aren’t in the know, selecting the right kind of motion seat isn’t just a cool factor; it’s pivotal for crafting a believable simulation. Trying to fly complex maneuvers with an underpowered setup can quickly break immersion. If your main goal is immersion, it’s worth comparing your motion plans with other realism-focused upgrades covered in Achieving Ultimate Realism With Custom Equipment.
Before even sketching out your seat design, getting a handle on these motion types is crucial. It sets the foundation of your project, guiding each choice you make down the line. Investing time in understanding these options means a tailored setup that elevates your sim experience and fully delivers on your expectations.
Design Considerations: Frame Strength and Ergonomics with Precision

For long sessions, many of the same posture and seating ideas used in office ergonomics apply, and guides like OSHA’s chair and seating recommendations are surprisingly helpful when choosing or adjusting your sim seat.
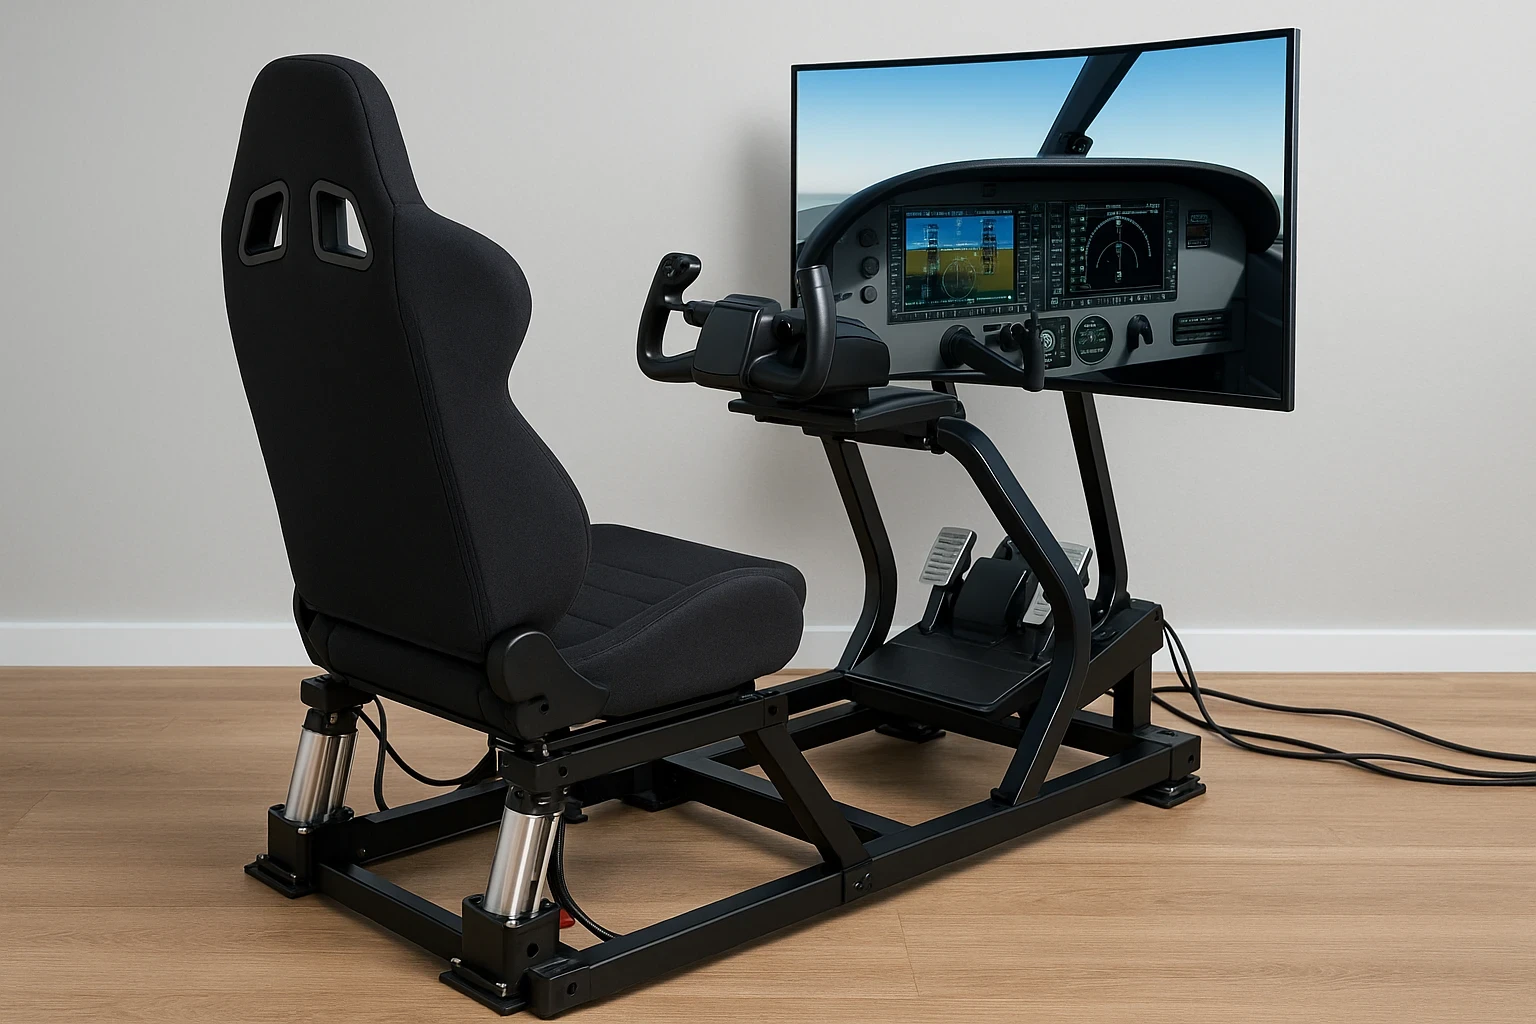
When you’re piecing together your motion seat, frame strength and ergonomics are at the top of the list. Think of the frame as the backbone that holds the whole thing together. Flimsy frameworks might buckle under pressure, especially in those more demanding moments of flight. You want something that can withstand the forces of your energetic flying maneuvers without a hitch.
Comfort can’t take a back seat either. Imagine being in the pilot’s chair for hours on end. You need cushioning that’s both supportive and breathable, so check your seat materials and design thoughtfully. Going for an ergonomic setup doesn’t just save you from aches; it makes sure you’re dialed in for those longer flights.
It’s all about finding that sweet spot where strength meets style. A good balance ensures your rig isn’t just functional but also looks like it belongs in a professional cockpit. Remember, a good-looking setup that can take a beating is exactly what you want when designing for frequent or long sessions.
For DIY builders, keeping a sharp eye on ergonomics means preventing strain and potential injury during extended use. You don’t have to compromise on comfort to make something look cool. Your long-term health and enjoyment of flying the virtual skies are what truly matter here.
Mastering Mechanical Dynamics: Motors, Actuators, and Structure
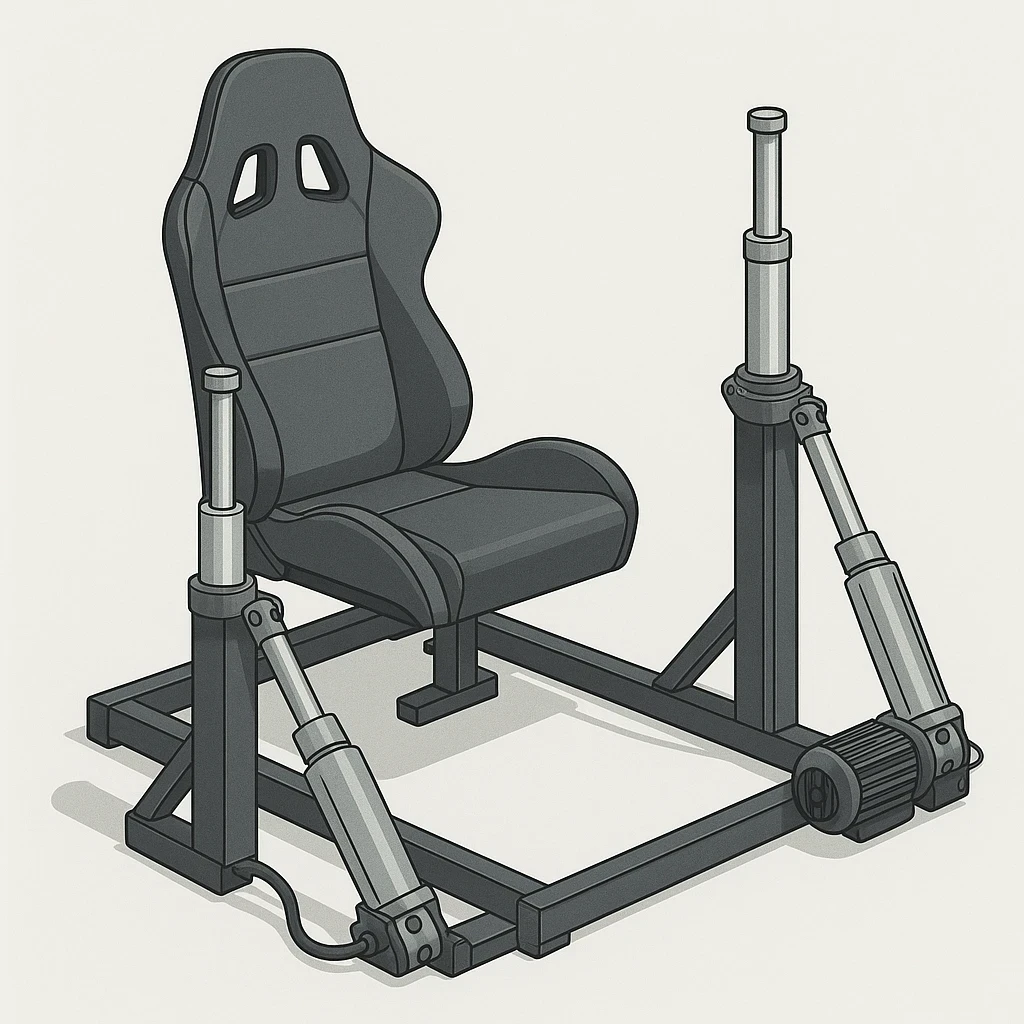
Choosing the right motors and actuators is crucial for your motion seat’s performance. These components are like the muscles that bring your rig to life, dictating how smooth and realistic your movements will be. You’ll want a setup that’s powerful enough to handle the demands of simulating different flight conditions, without draining your power supply.
Torque, the unsung hero here, plays a vital role. It’s all about force and rotation, basically how much muscle your motors can flex under load. A setup that’s underpowered might stall or feel sluggish, totally killing the vibe of realistic motion. The right torque makes for responsive, balanced motion that matches the forces created by aerobatic maneuvers.
Geometry and linkage placement might sound like rocket science, but they’re important for ensuring fluid motion. Where you position your linkages affects precision and efficiency. The aim? To make those movements as seamless as possible, so when the uppity loops and daring dives happen, they feel natural and not mechanical.
Understanding these mechanical processes isn’t just geekery; they’re the secret sauce to crafting a top-notch flight experience. Dive into the specifics and you’ll build a seat that feels real and immersive, making every session count more.
For a gentle introduction to how DC motors behave under different loads and speeds, the examples in Adafruit’s Arduino DC motor guide are a handy starting point, even if you eventually move to more powerful hardware. Once you start matching motor choice with the rest of your hardware, Essential Hardware Upgrades for Enhanced Sim Experiences gives a broader view of how everything works together.
Integrating Technology: Controllers, Drivers, and Power Fundamentals
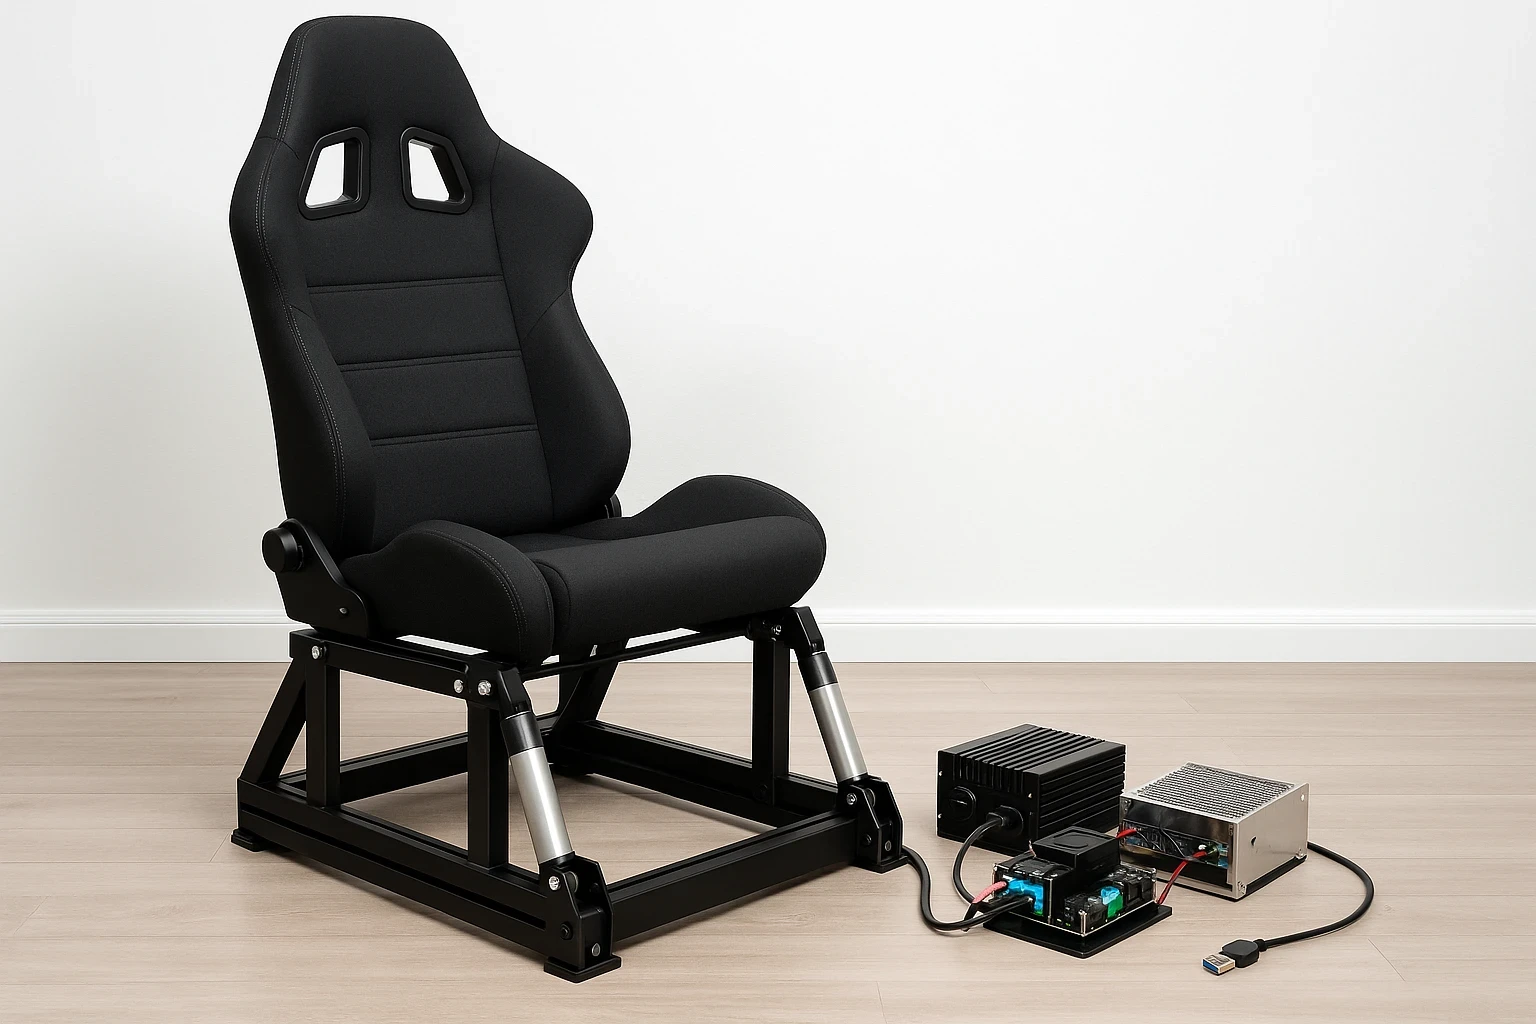
Setting up the tech side of your motion seat involves a blend of controllers, drivers, and power supplies. Controllers act like the brain, translating your flight sim’s data into action. It tells your setup how to move—sort of like a maestro conducting an orchestra.
Drivers work alongside controllers to manage the flow of electrical power, ensuring that signals from your sim are interpreted correctly. Trust me, having reliable drivers means your movements are sharp, not jerky or inconsistent movements.
Power supplies provide the juice needed to keep everything running smoothly. A dependable power supply ensures the system remains stable, preventing sudden shutdowns in the middle of a crucial maneuver. Battery failures or drops in power can ruin a streak of perfect loops.
Safety should never be a second thought. Think about fail-safes like an emergency stop button and limiters to prevent movements from going full wonky. Testing your setup without stepping into the seat allows you to spot and fix glitches without any risks.
Ensure technology components are robust yet straightforward. A streamlined approach not only simplifies troubleshooting but also enhances the overall reliability of your setup. Keeping things neat and orderly can make adjustments and future upgrades a breeze.
Many builders lean on motion-specific tools like SimTools, which has detailed documentation for motion interfaces and tuning to keep control signals and safety features under control while you experiment.
Crafting the Perfect Experience: Motion Software and Realism
Motion software is where the magic happens, translating in-game data into tangible movements. It links your hardware with the virtual world, creating a seamless experience that makes you feel miles above the clouds. Ease into the software’s capabilities, and you’ll enhance how well your seat replicates on-screen action.
Fine-tuning is key, especially when it comes to axis adjustments, smoothing, and washout functions. These elements dictate how fluid each movement feels and how quickly the rig responds to in-game changes. Subtler movements often feel more natural, offering a delicate realism that can be lost with overly aggressive action.
Smooth motion also depends on how well your PC handles the sim itself, so it’s worth pairing your software tuning with the tips in How to Optimize Your PC for Performance in Flight Simulators.
Don’t overlook the home-life aspects either. Consider the noise level of your setup and the space it will occupy. You don’t want a setup that rattles the entire house or takes over your living room entirely. Balancing these factors helps ensure a more peaceful integration into your home setup.
Budget and time are your unsung advisors during the build, guiding decisions and keeping everything realistic. A prototyping mindset steers you clear of common pitfalls and into a creative problem-solving approach. It’s not just about creating a masterpiece but understanding the journey of inventive exploration.
Building this setup requires balancing precision with comfort, tech with simplicity, and realism with impact. From subtle motion techniques to mindful budgeting, every element contributes to crafting an unforgettable flight sim adventure. With careful planning and tuning, a DIY setup can deliver an impressive level of immersion. If you’d like to see how motion fits into the bigger training picture, you might also enjoy How Realistic Flight Simulators Enhance Pilot Training and Understanding Add-Ons: Must-Have Software Enhancements.
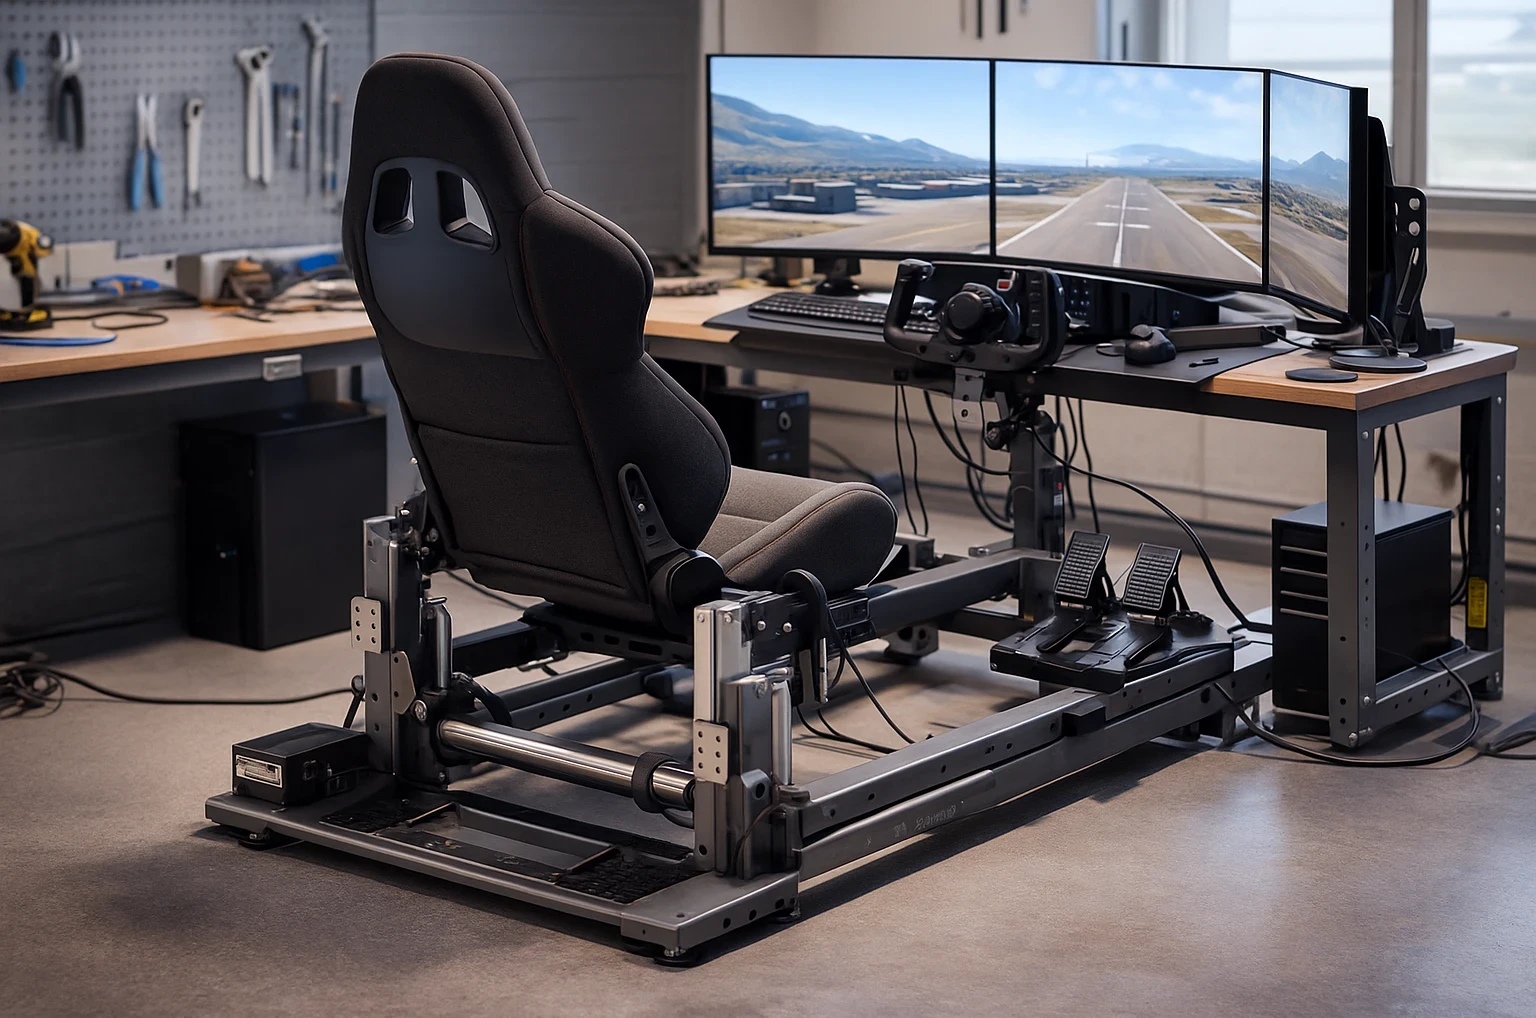
Watch: Real-World Flight Simulator Motion Seat Build
Seeing a real motion seat in action helps bring all the concepts discussed above together. This video walks through the process of building a flight-simulator motion setup, showing how the frame, motion components, and controls work in a practical environment. It’s especially useful for visualizing how motion is tuned for aircraft simulation, where smooth pitch and roll cues matter far more than aggressive movement.
Final Thoughts: Bringing Motion and Realism Together
Building a motion seat for flight simulators is as much about smart planning as it is about hardware and software. From choosing the right motion type to balancing frame strength, ergonomics, mechanics, and tuning, each decision plays a role in how convincing the final experience feels. When approached with realistic expectations, subtle motion cues and careful adjustments often deliver better immersion than aggressive movement.
If you continue refining your setup over time and learning from each iteration, you’ll steadily improve both realism and comfort. For more in-depth guides and practical insights on simulator hardware and realism, explore related articles on Flight Sim Essentials.