
Imagine settling into your home flight simulator and realizing the cockpit around you actually feels yours — not just whatever came out of the box. That’s the charm of 3D printing. It lets you build pieces that match the way you fly, whether it’s a custom panel, a set of switches, or a throttle lever that finally feels right in your hand.
3D printing opens up a world of possibilities for aviation enthusiasts looking to personalize their simulators. From crafting unique control panels to designing custom switches, it offers a level of customization that’s hard to beat. And the best part? You can do this all from the comfort of your home using affordable, easy-to-access technology.
Getting started doesn’t require a workshop or high-end tools — just a basic 3D printer and a willingness to tinker. Even an entry-level machine can handle most cockpit parts. Once you’ve got it set up, the real fun begins: experimenting with shapes, testing materials, and slowly shaping a simulator that reflects your flying style. This goes hand-in-hand with broader hardware improvements you may explore later, like those mentioned in Essential Hardware Upgrades For Enhanced Sim Experiences.
If you’re not the super-techy type, don’t worry — nobody starts as an expert. The flight sim and 3D printing communities are packed with tutorials, shared models, and friendly folks who’ve already figured out the challenges you’re about to face. Whether you want to print a full panel or just try a simple knob, there’s always someone offering a shortcut or a clever idea. Popular model-sharing sites like Thingiverse and GrabCAD are great place to browse.
The world of 3D printed simulators is a blend of technology and creativity, offering endless opportunities to innovate. By investing a little time in learning the basics, you’ll join a vibrant community that’s reimagining what home flight simulation can be.
Material Matters: Choosing the Right Filament for Simulator Parts

When it comes to picking the right material for your 3D printing projects, the type of filament can make or break your results. For those diving into custom flight simulations, choosing the right filament means balancing durability, workability, and cost.
PLA, the most popular 3D printing material, is a reliable choice for beginners. It’s user-friendly and works well for printing detailed parts like instrument panels and decorative elements. But it has its downsides, like being less heat resistant, which might matter if your simulator gets warm during extended sessions.
ABS is tougher and more heat-resistant, making it a favorite for printing components needing greater strength, like control yokes or joystick mounts. But it’s a bit tricky to print due to its tendency to warp, especially if your 3D printer doesn’t have an enclosed chamber.
PETG is another great option, striking a sweet spot between PLA and ABS. It combines easy printability with strength and flexibility, which is perfect for parts that will see frequent use and slight stress, like throttle handles and gear levers.
Choosing a filament really comes down to what the part will do. Start with PLA to learn the basics, then move to ABS or PETG once you’re ready for components that take more stress. And don’t be afraid to experiment — half the fun of 3D printing is discovering what works best for your own setup, one test print at a time.
No matter the choice, remember that 3D printing involves some trial and error. Don’t shy away from experimenting with different materials to discover what works best for your unique setup. And always lean on the community’s wealth of knowledge when questions pop up. There’s always someone out there who’s tackled the same challenges and is happy to share their insights.
Designing and Printing Custom Cockpit Accessories

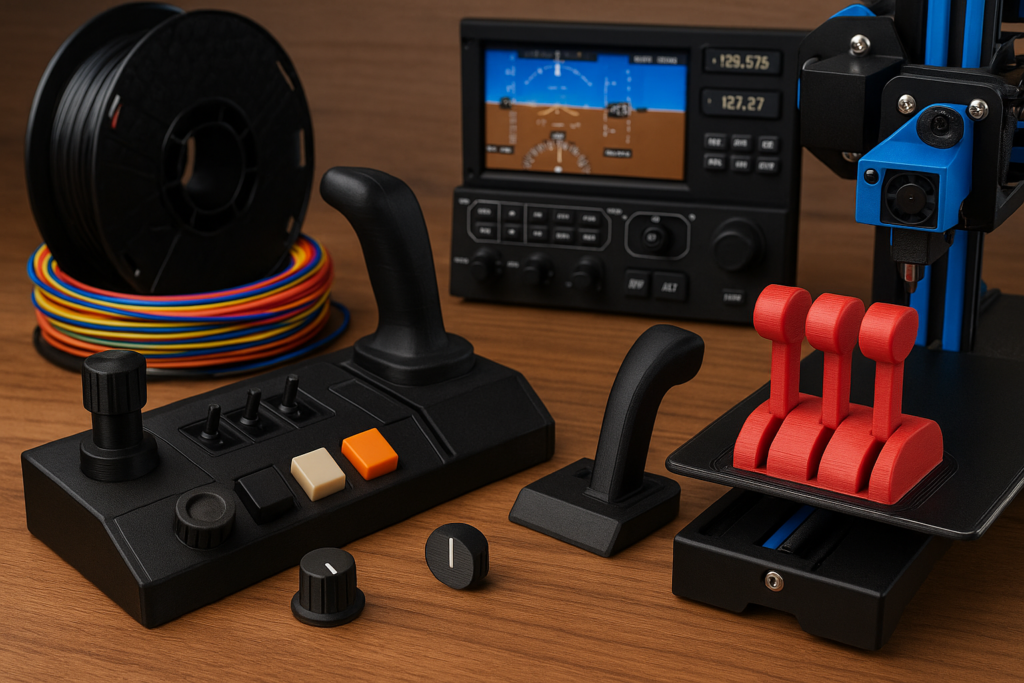
Creating custom cockpit accessories with a 3D printer is like crafting your own story within the world of flight simulation. From crafting your own knobs to paneling your setup with self-designed surfaces, the possibilities are endless and incredibly fun.
A great first step is browsing places like Thingiverse or GrabCAD. You’ll be surprised how many simmers upload ready-to-print files — radios, autopilot panels, throttle handles, and more. When you’re ready to go beyond pre-made files, tools like Tinkercad or Fusion 360 let you shape your cockpit exactly the way you imagine it.
For those more experienced, software like Tinkercad or Fusion 360 lets you take that creativity up a notch by crafting your own designs. Whether you want that cockpit panel to have just the right curve or need specific dimensions to fit your setup, these tools offer the flexibility to tweak every detail.
But remember, it’s not just about downloading and hitting print. Think about how the piece will feel during a long flight. Sometimes that means scaling a model up a little, adjusting the angle, or tweaking a curve so it rests naturally under your fingers. Small comfort changes make a big difference when you’re flying for hours.
After printing, a little refinement can go a long way. Sanding and smoothing out imperfections makes the parts not only look good but also feel right when you’re interacting with them during flight sessions. Plus, giving them a coat of paint or primer can really make your cockpit stand out, adding another layer of realism and immersion to the experience.
Custom cockpit accessories aren’t just about aesthetics—they enhance immersion and tactile feedback. If you’re already into customizing aircraft systems, you might enjoy exploring tools mentioned in Exploring Advanced Avionics For Seasoned Sim Users as well, so take the leap, start designing, and watch as your simulation setup transforms into a true cockpit experience.
Technological Integration: Fusing 3D Prints with Electronics

Going beyond aesthetics, integrating your 3D-printed parts with electronics can take your flight simulation experience to new heights. Imagine flipping switches and turning knobs that actually work, just like in a real cockpit. This is where tech like Arduino and Leo Bodnar boards come into play.
Arduino boards, with their flexibility and ease of use, are perfect for beginners looking to add interactivity to their simulators. They can handle buttons, lights, switches, and even more complex controls with some coding magic. Getting started might seem daunting, but remember, every expert was once a beginner. There are plenty of tutorials and projects online to help you learn the ropes — the Arduino official site is a solid place to start.
Leo Bodnar boards are another fantastic choice, especially for flight enthusiasts wanting to create custom controllers. They’re renowned for their simplicity in connecting multiple inputs directly to a PC via USB without much hassle. They’re plug-and-play, so you can focus more on the fun part—designing and using your setup.
Synchronizing 3D-printed panels with these boards means you can personalize every aspect of your simulator without sacrificing functionality. You’ll find people all over the world sharing their setups online, often with open-source diagrams and code to make the integration process smoother.
These tech upgrades transform static parts into dynamic components of your simulation experience. Not only does this increase the realism, but it also allows you to tailor your simulation environment to your exact preferences, ensuring you’re ready for whatever flights you decide to tackle. If you’re building more complex setups, pairing this with guidance from How To Optimize Your PC For Performance In Flight Simulators can help everything run smoothly.
Finishing Touches: Perfecting and Assembling Your 3D-Printed Setup

The final step in your 3D printing journey for flight simulations is all about the details. After all the printing and coding, it’s time to assemble everything into a seamless, functioning setup. This is where your attention to detail can really pay off.
One major perk of 3D printing is the cost-effectiveness. Building parts at home is friendly on the wallet compared to buying pre-made components. This means you can afford to experiment more, refining your setup to perfection without breaking the bank.
A bit of finishing work can transform a print from “hobby project” to “real cockpit hardware.” A smooth sanded surface, a layer of primer, and a coat of paint can give your switches and panels a surprisingly professional look. It’s one of those extra steps that really ties the whole setup together.
Creating a modular cockpit setup is a smart strategy, especially when space or budget might limit you. Using 3D-printed mounts and brackets, you can easily rearrange or replace panels as your needs change. This flexibility lets you keep evolving your simulation experience without starting from scratch. This works perfectly alongside broader cockpit projects like Building A DIY Home Cockpit On A Budget.
If you fly in VR, 3D printing becomes even more helpful. Many simmers create custom brackets, tactile switches, or uniquely shaped controls that are easy to find by touch alone — a huge win when you’re flying blind with a headset on.
Remember, there’s no one-size-fits-all in simulation setups. Your printed parts tell the story of your aviation passion, blending functionality with personal flair. It’s all about creating a flight simulation experience that’s uniquely yours.
Bringing Your Custom Cockpit to Life
When you take a step back and look at everything you’ve created — from the first rough print to the final painted component — it’s incredible how much 3D printing can transform a basic simulator into something that feels truly personal. Every knob, bracket, or panel you customize adds another layer of realism that simply doesn’t exist out of the box. And the best part? You built it yourself, at your own pace, piece by piece.
Home flight simulation has always been about creativity and experimentation, and 3D printing fits perfectly into that spirit. Whether you’re printing a single throttle handle or crafting a full-scale overhead panel, each project moves you closer to a setup that reflects your style and the aircraft you love to fly.
Ready to Take Your Simulator Even Further?
If this guide sparked ideas for your next project, now’s the perfect time to dive deeper. Explore more ways to enhance your home cockpit with articles like Building A DIY Home Cockpit On A Budget and Essential Hardware Upgrades For Enhanced Sim Experiences. And if you’re in the mood to level up your flying technique, check out guides on navigation, weather flying, and avionics to complement your new hardware.
Whether you’re upgrading your simulator for fun, training, or pure immersion, keep experimenting, keep creating, and most of all — keep enjoying the journey. Your cockpit is only going to get better from here, and there’s always a new idea waiting to take flight.